FAQs
- 1. What is an account?
- 2. How do I create an account?
- 3. How can I see what’s new in an account?
- 4. What is the difference between a member and a guest?
- 5. How do I know if I’m an admin, a member, or a guest on an account?
- 6. Can I switch plans?
- 7. Do I have to pay for external users?
- 8. What is the difference between an “Account” and a “Profile”?
- 9. How do I edit my Procorem profile?
1. | What is an account? |
An account is the top level in Procorem and is typically used to represent a team or department within your organization. When you create an account, you become a member of Procorem who can create WorkCenters, upload and store documents, create task deadlines, and more. Click the following link to learn more about the complete Procorem Hierarchy. | |
2. | How do I create an account? |
To create an account in Procorem, you can sign up on our website, or you may be invited by an existing Procorem user. I want to sign up— If you would like to sign up for a new account from our Procorem website, head to the pricing page to review which plan works best for you and click Sign Up Now. This will walk you through the sign up process to begin using Procorem right away. If you would rather start with a free 30-day trial, click Try it free for 30 days to get started for free. I was invited to join— If you were invited to join Procorem, you likely received an invitation email that looks like this:  To get started using Procorem, click Sign Up in the email, which will prompt you to confirm your name and email as well as create a password for the account. Remember, there is never any charge for Procorem for guests invited to an existing account. The create account screen will look like this:  When you are invited to Procorem, you will begin receiving notification emails to keep you aware of project activity. If you have not yet created an account and click on a notification email, you will be prompted to first create an account before you can log in to Procorem. Check out our Notifications in Procorem page for more information on Procorem notifications. NoteNew, invited SAML/SSO users visiting the registration page will not see the Password field. These are users whose credentials are managed and authenticated through their organization’s account controls. | |
3. | How can I see what’s new in an account? |
Click the account name on the left navigation panel. A list of WorkCenters, by category, will be displayed. If there is a green triangle in the upper left corner of a category, it means there is new content. Click to expand the category, and the WorkCenter(s) with new activity will show a “New” icon in on the right side of the WorkCenter row. Overdue items are quickly identified by an “Overdue” icon. 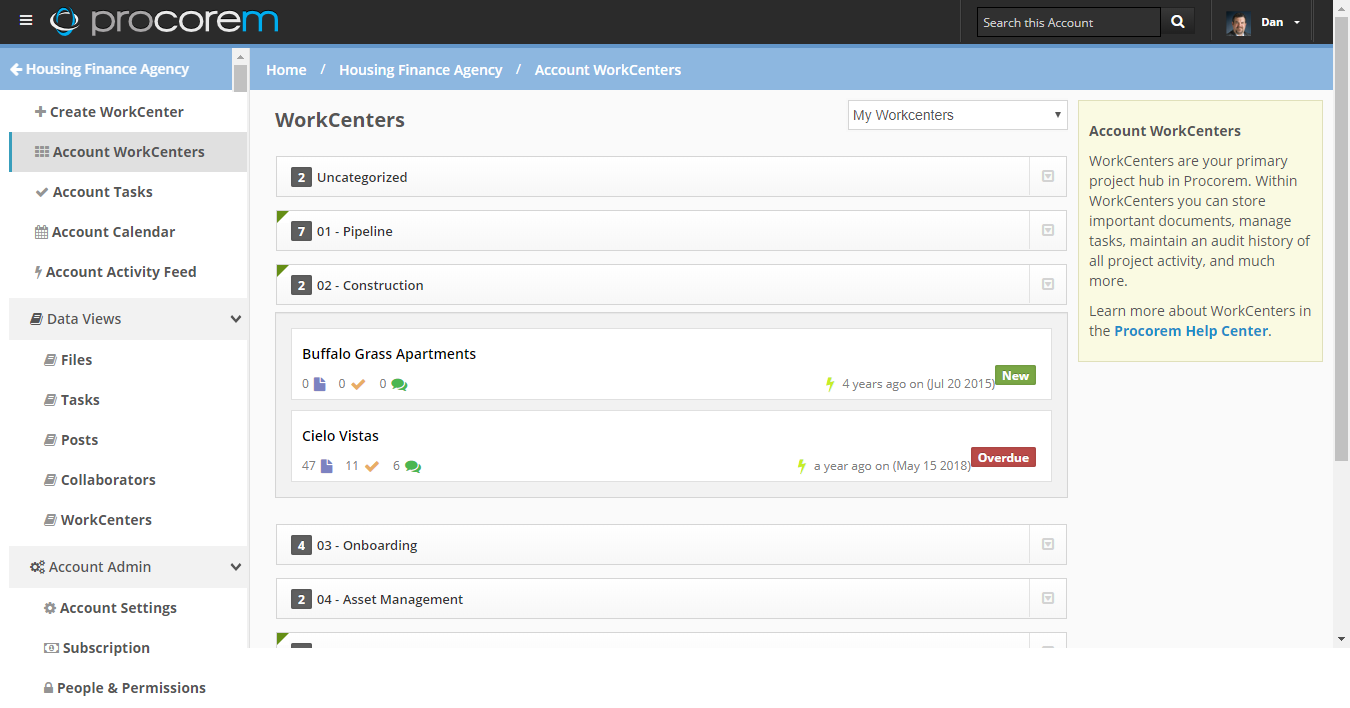 | |
4. | What is the difference between a member and a guest? |
Guests are free and unlimited regardless of plan. Members are able to do more in Procorem, such as create WorkCenters and invite collaborators. To learn more about members and guests, check out the Securities, Permissions, and Guests section. | |
5. | How do I know if I’m an admin, a member, or a guest on an account? |
Head to your Home page and then click My Accounts. Here you will see a list of all the accounts to which you are associated, as well as your membership and security level in each one listed in the bottom left hand corner of the account. 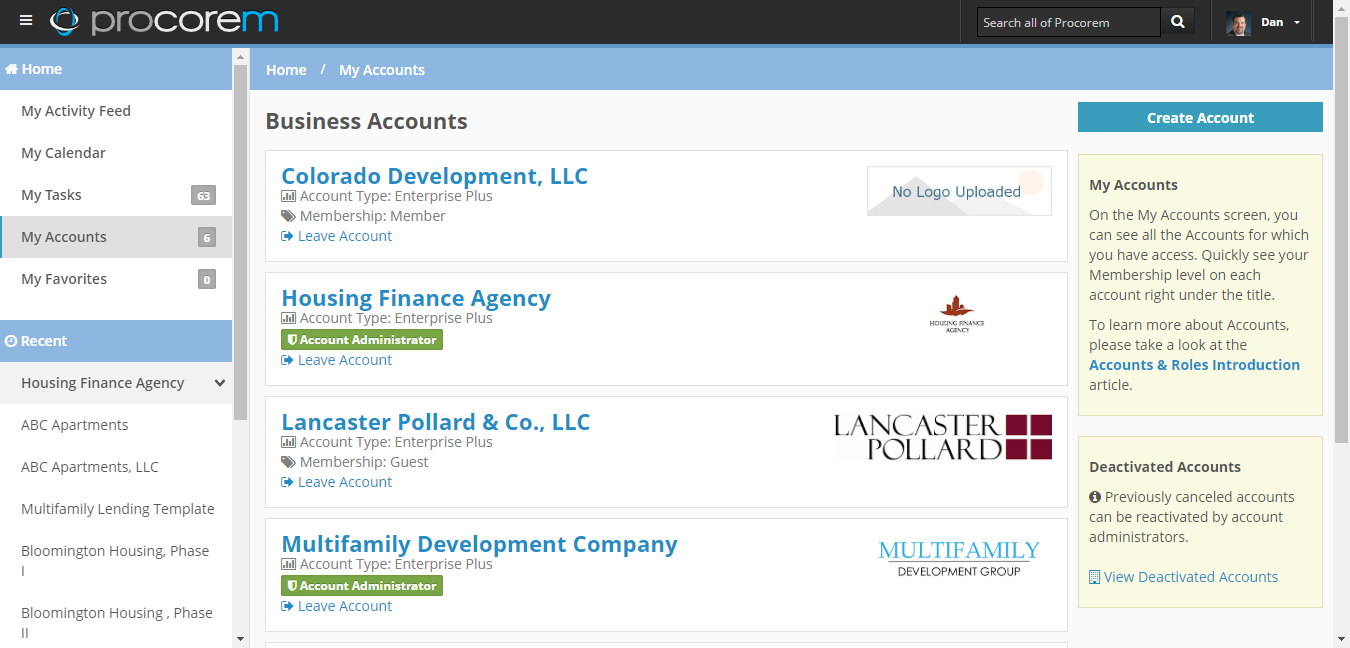 | |
6. | Can I switch plans? |
Yes, switching plans is easy. All you need (or the administrator of your account needs) to do is log in, go to the Account Subscription page, and then select your upgrade. | |
7. | Do I have to pay for external users? |
Guests that you invite to your WorkCenters are always free—unlike other solutions that count every user. If you have a large organization and are interested in Procorem Enterprise, contact us for pricing. | |
8. | What is the difference between an “Account” and a “Profile”? |
A profile contains information related to one user accessing the application (name, contact information, login information, picture, and so on), and can be connected to multiple accounts. An account is the top level in Procorem and is typically used to represent an organization or department within your organization. When you create an account, you become a member of Procorem who can create WorkCenters, upload and store documents, create task deadlines, and more. | |
9. | How do I edit my Procorem profile? |
Click the drop down arrow located next to your name in the upper right hand corner of your screen. Click Profile. 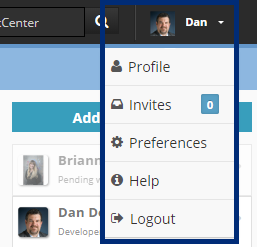 On the new screen, you can make changes to the information you’ve previously added, upload a photo, and so on. When you are done, click Save changes. 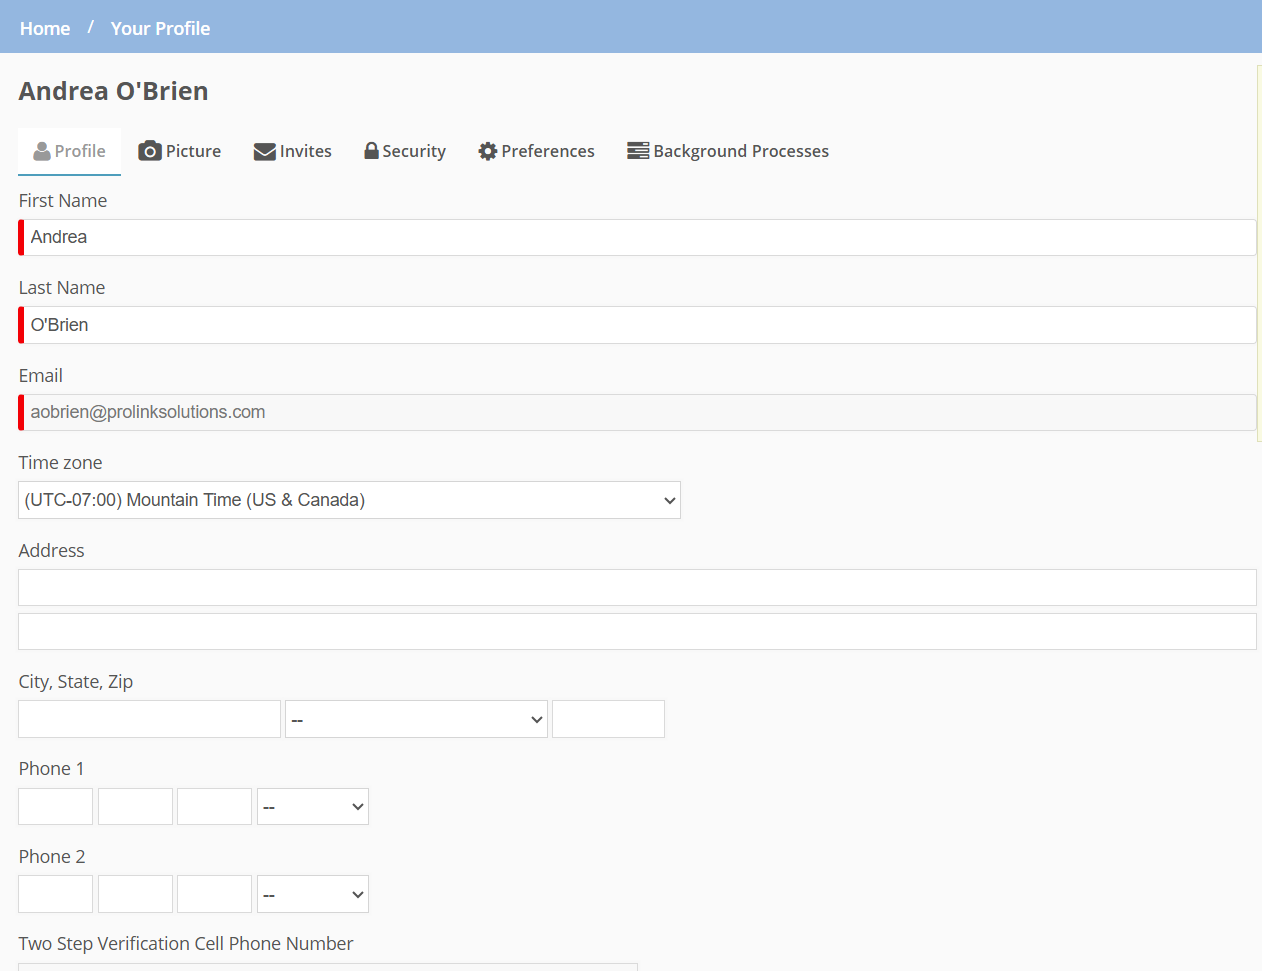 |
1. | How do I log in? |
To log in to Procorem, visit https://app.procorem.com or www.procorem.com and click Log In on the upper right of the screen. The login screen will look like this: 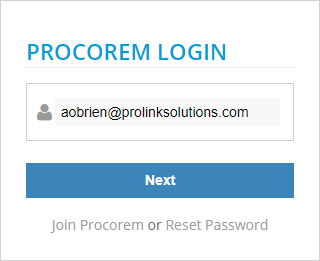 Once on the login screen, enter your email address and then click Next. On the following screen, enter your password and click Sign In. 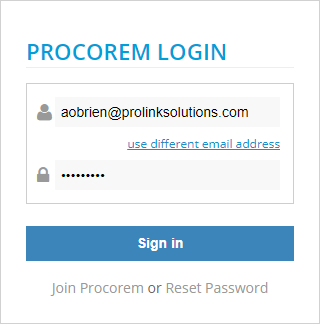 Note that SSO users will enter their email address and click Next, and then be re-directed to authenticate their identity through their organization’s SAML login screen. | |
2. | How do I log out? |
To log out of Procorem, select your profile picture on the upper right of the screen then click Logout. 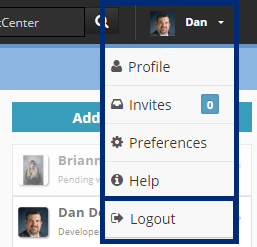 | |
3. | How do I reset my password? |
If you forgot your password, head to the login page and select the “Reset Password” link. 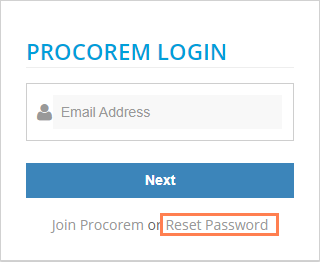 Once selected, you will be asked to provide your email address, which will send you an email prompting you to reset your password. Click Reset Password in the email and you will be guided to the following page: 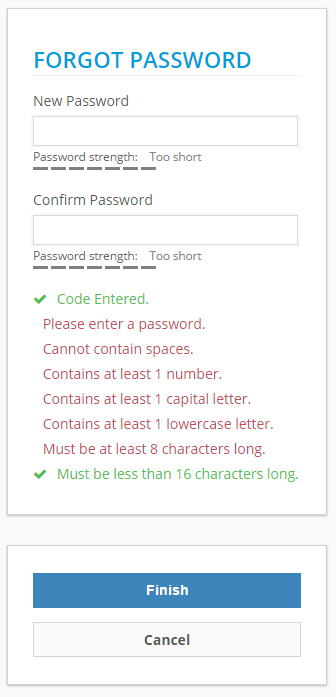 NoteThe Reset Password fields are disabled for SAML/SSO users. These are users whose credentials are managed and authenticated through their organization’s account controls. |
- 1. What is a WorkCenter?
- 2. How do I manage my favorite WorkCenters?
- 3. How do you delete a WorkCenter?
- 4. How do I change my WorkCenter name?
- 5. What is a collaborator?
- 6. How can I invite collaborators to a WorkCenter?
- 7. How do I remove someone from a WorkCenter?
- 8. How do I change a collaborator’s WorkCenter permissions?
1. | What is a WorkCenter? |
WorkCenters roll up directly to accounts. For every account, you can have an unlimited number of WorkCenters. Think of WorkCenters as a secure, online space which allows users to store, share, and collaborate on work. WorkCenters typically represent a project, team, or property. Within WorkCenters, you can invite different collaborators, assign unique security privileges, upload documents, assign tasks, comment and instant message as well as monitor activity across the WorkCenter. | |
2. | How do I manage my favorite WorkCenters? |
Once you’re in a WorkCenter where you want to add or remove from your list of favorites, click Favorite this WorkCenter on the bottom of the left hand navigation menu. Click the button again to remove the WorkCenter from your favorite list. 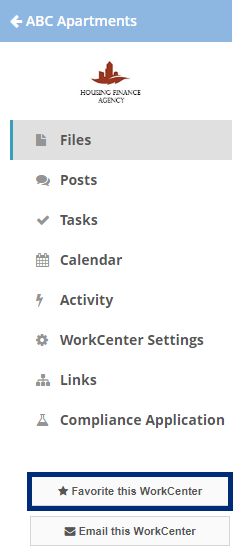 To see a list of your favorite WorkCenters, head to the Home Page and click My Favorites in the upper left navigation menu. | |
3. | How do you delete a WorkCenter? |
Only an Account Administrator has the ability to delete WorkCenters. Once you’re in the WorkCenter you want to delete, navigate to the left navigation panel and click WorkCenter Settings. 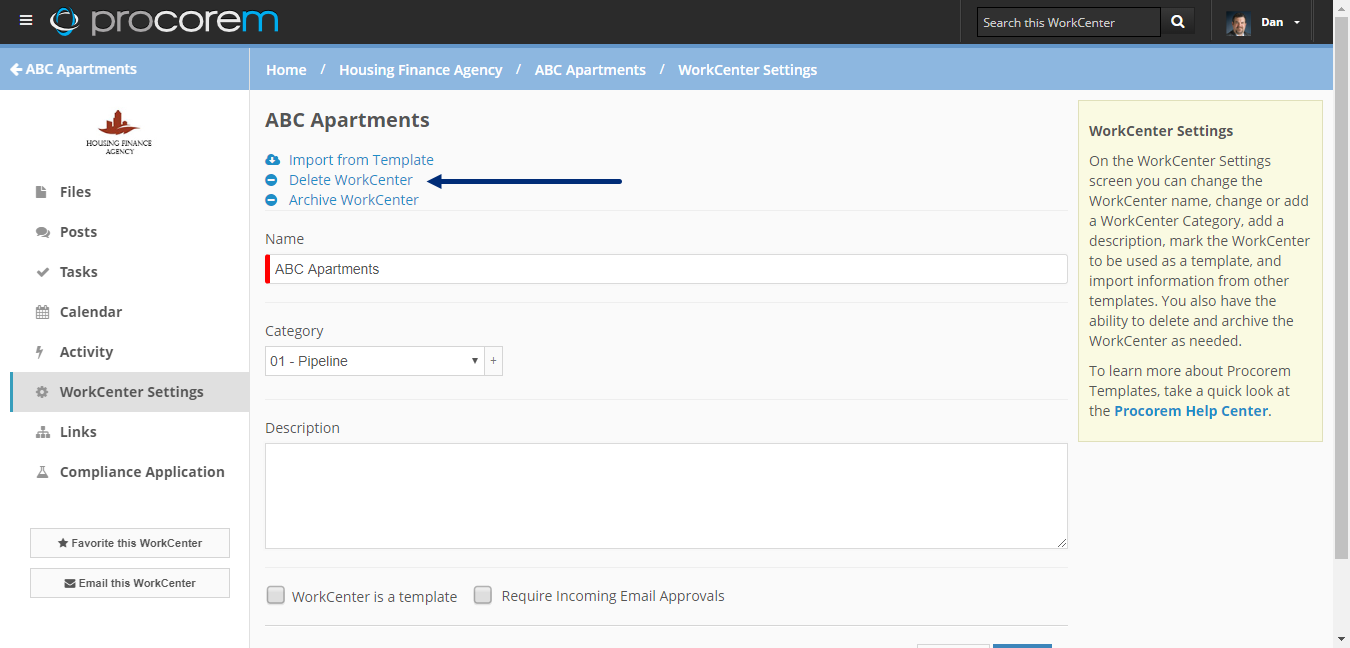 Next, click the “Delete WorkCenter” link. You will be asked to verify that you actually want to delete the WorkCenter. If so, type 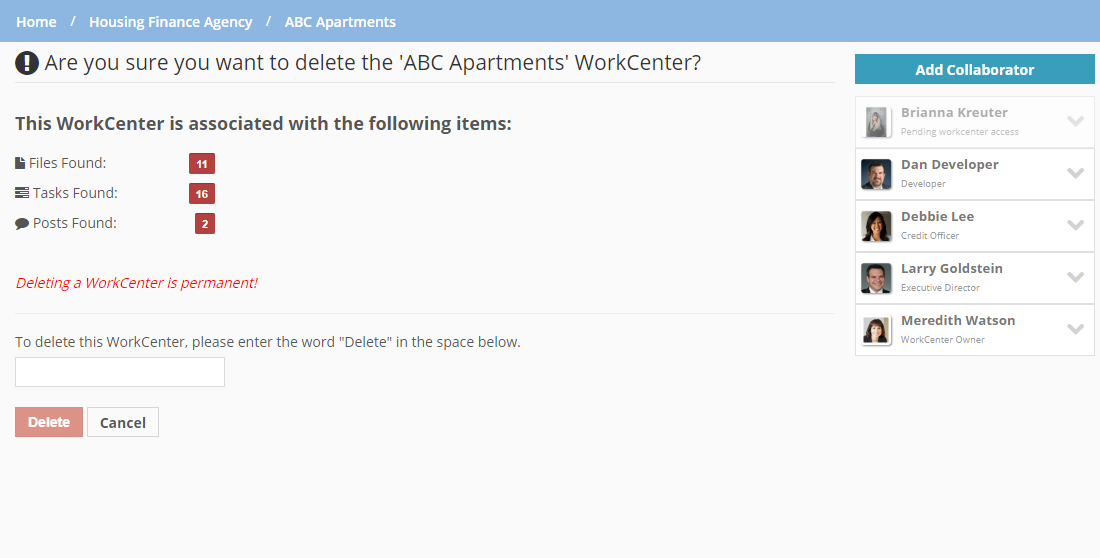 | |
4. | How do I change my WorkCenter name? |
Only WorkCenter Owners, WorkCenter Administrators, and Account Administrators have the ability to change the name of a WorkCenter. First, head to one of your WorkCenters, then click the WorkCenter Settings link on the left navigation panel. 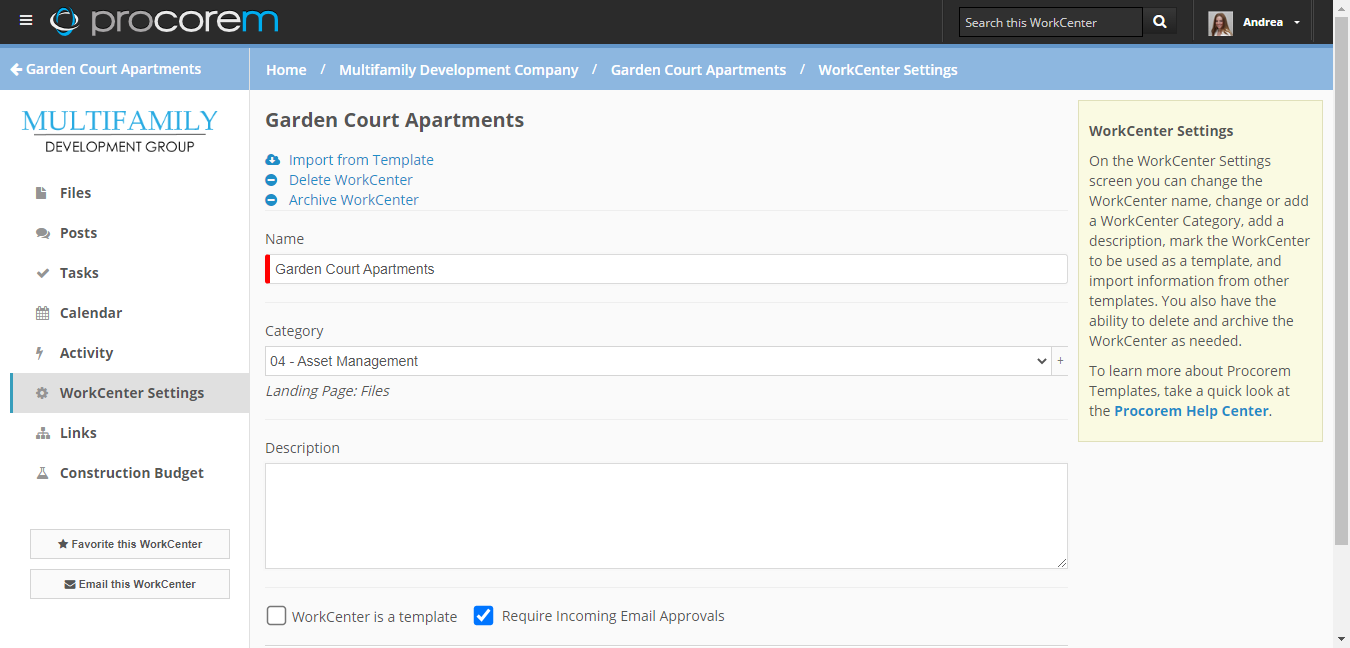 Next, type in the new name you’d like for your WorkCenter. Add or modify the description of the WorkCenter, then click Save. | |
5. | What is a collaborator? |
A collaborator is a person whom you have invited into one of your Procorem WorkCenters. Collaborators have the ability to see all the information on the WorkCenter, but can be provided customized security settings to control how they interact with the information stored on the WorkCenter. Typical rights of collaborators include the ability to read posts, upload documents, add posts, download files, and complete assigned tasks. To learn more about Collaborator security, review the Security, Permissions and Guests section. You can also set configurable security roles for each collaborator. If a collaborator no longer needs access to the WorkCenter, he or she can be removed by the owner. | |
6. | How can I invite collaborators to a WorkCenter? |
When you’re in a WorkCenter, click Add Collaborator on the right side of the page. 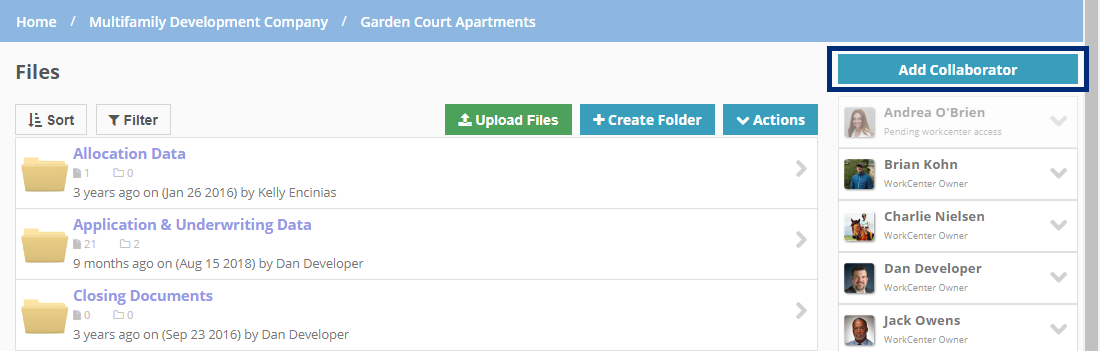 Once clicked, you’ll see the Add Collaborators screen. Now you can invite new users to the WorkCenter, both those who currently use Procorem and those who do not.  If they do not currently use Procorem, you will need to provide an email address so we can invite them to join. | |
7. | How do I remove someone from a WorkCenter? |
You must be a Member and the WorkCenter Owner to remove contributors from WorkCenter. WorkCenter Admins and Account Admins can also remove contributors from WorkCenters, even if they are not part of the WorkCenter itself. Go to the WorkCenter that has a member you want to remove. On the right side of your screen is a list of the participants in your WorkCenter; click the drop down arrow next to the appropriate person’s name. Click Remove from WorkCenter, and then click OK. This person is now removed from the WorkCenter. 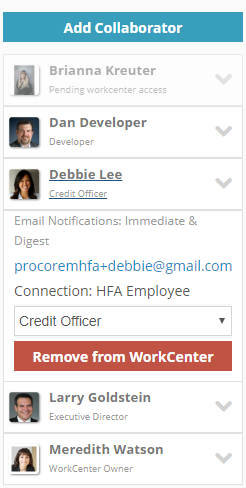 | |
8. | How do I change a collaborator’s WorkCenter permissions? |
You must be a Member and the WorkCenter Owner to change a collaborator's WorkCenter permissions. WorkCenter Admins and Account Admins can also change permissions, even if they are not part of the WorkCenter itself. Go to the WorkCenter that has a member whose role you want to change. On the right side of your screen is a list of the participants in your WorkCenter; click the drop-down arrow next to the appropriate person’s name. Change the user’s permissions by changing their role in the drop-down menu. A green bar at the top of your screen will alert you that your changes have been saved. 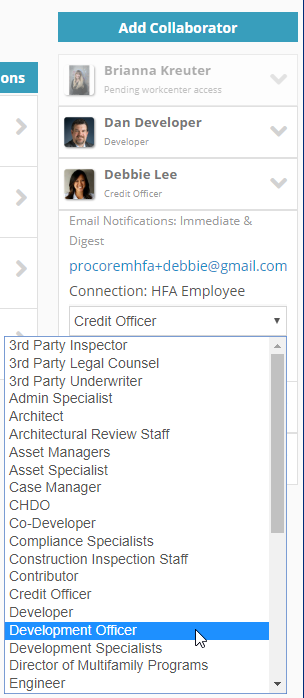 |
- 1. How do I add a post to a WorkCenter?
- 2. Who can see what I do or post in Procorem?
- 3. How do I create a folder?
- 4. Do you offer folder level security?
- 5. Can I rename a document that’s already in a WorkCenter?
- 6. How can I move a file from one WorkCenter to another WorkCenter?
- 7. How can I copy a file from one WorkCenter to another WorkCenter?
- 8. How do I download a document?
- 9. How can I upload a new version of a file that is already in my WorkCenter?
- 10. How do I comment on a file or document?
- 11. How do I create, assign, and approve tasks?
1. | How do I add a post to a WorkCenter? |
In Procorem, posts and comments are used to communicate important project activity to team members. Posts can be made on the WorkCenter, document and task level. All posts and comments are recorded in Procorem for later reference and are fully integrated with each user’s email system to ensure everyone stays on the same page. To make a post on the WorkCenter level, head to the WorkCenter and click Posts from the left navigation menu. A text field will appear for you to type in your message. When you are finished, click Create Post. You will see a green message confirming your post was added. 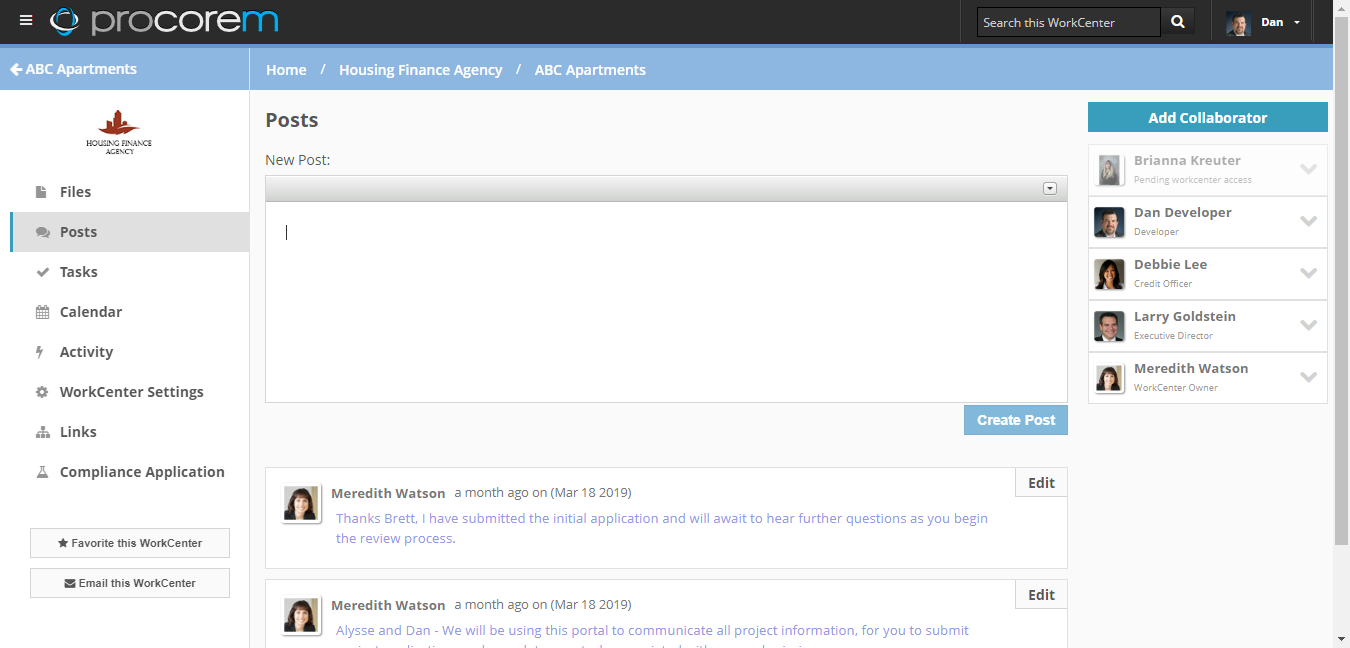 | |
2. | Who can see what I do or post in Procorem? |
When you post a message, upload or download a file, assign a task, or do anything in Procorem, the only people who can see it are those who are invited into your WorkCenter. Account Administrators have the ability to see anything that goes on in a Procorem account. To learn more on WorkCenter capabilities, review the WorkCenter Introduction. | |
3. | How do I create a folder? |
Only members with the correct WorkCenter privileges have the ability to create new folders. Once you are in the WorkCenter where you want to create a folder, click Add Folder in the middle of the screen (it is designated with a plus sign). A window will appear, asking you to name the folder. 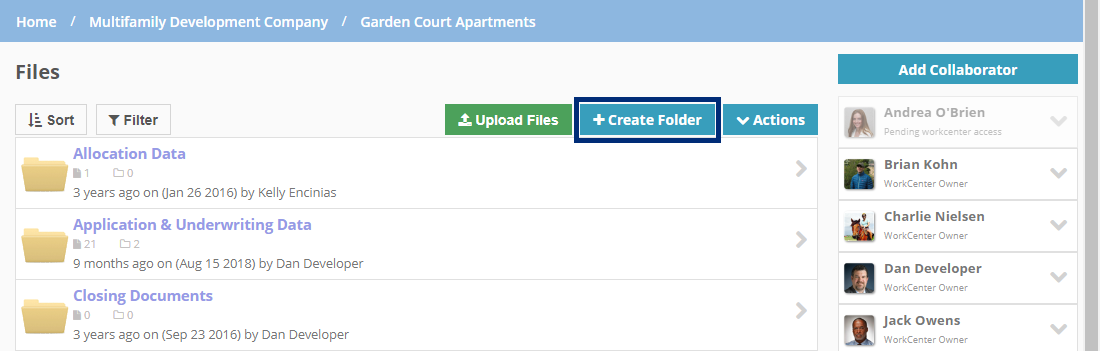 Type in the name, then click Save. You will now have a new folder. | |
4. | Do you offer folder level security? |
No, Procorem is not designed with folder level security. This is intentional as managing security on a folder level can be burdensome and often leaves organizations with potential security risk. With Procorem, security is controlled on the WorkCenter level. Only the people you invite to the WorkCenter can see and engage with the information. To learn more about security check out our Security, Permissions, and Guests section. | |
5. | Can I rename a document that’s already in a WorkCenter? |
Yes. First head into the WorkCenter with the file and then click the file Details button.  Next, type the new file name into the File Name field, and then click Save. 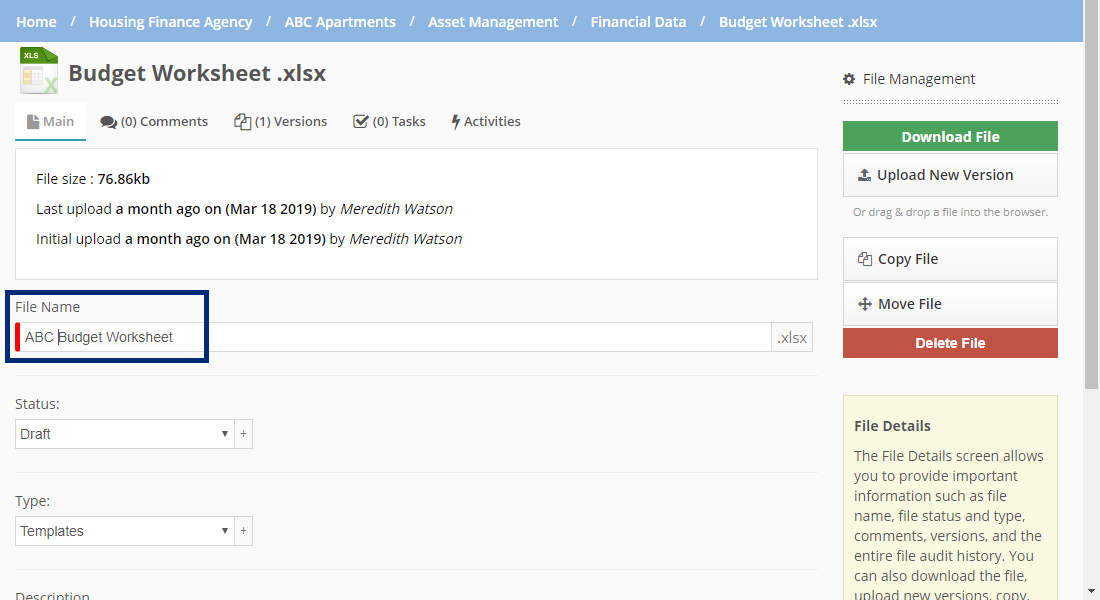 | |
6. | How can I move a file from one WorkCenter to another WorkCenter? |
Once you are in the WorkCenter that contains the file you want to copy, select the file from the list. Click Move File on the right hand of your screen. 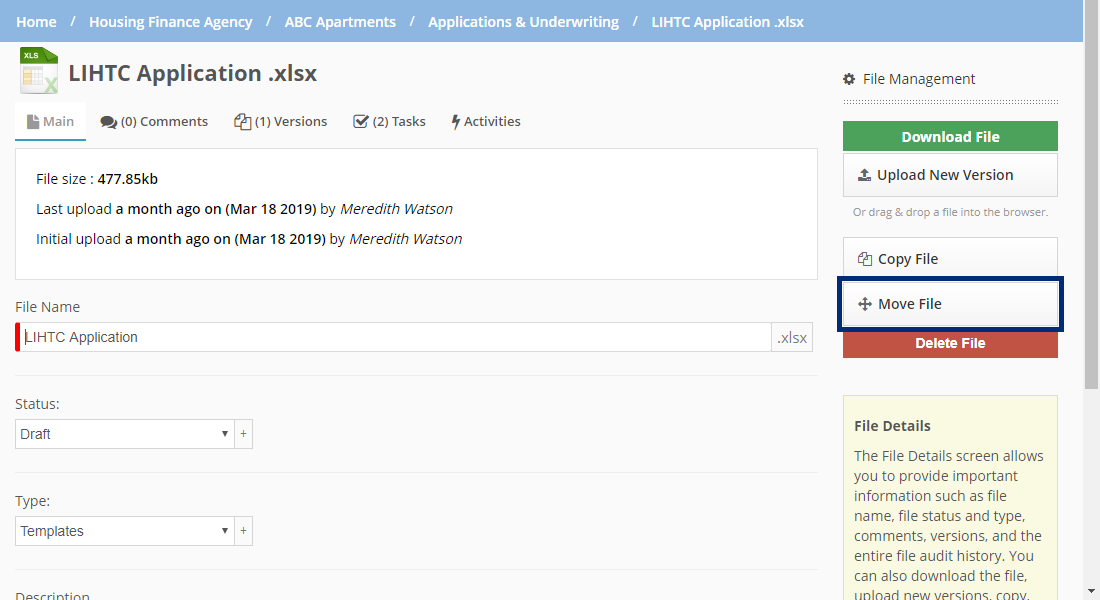 A window will appear, asking you to select a destination for the file. Click the appropriate WorkCenter, then click Move. Your file has now been moved. | |
7. | How can I copy a file from one WorkCenter to another WorkCenter? |
In Procorem you can easily copy files in the same way that you move files. Once you are in the WorkCenter that contains the file you want to copy, select the file from the list. Click Copy File on the right side of your screen. A window will appear, asking you to select a destination for the copied file. Click the appropriate WorkCenter, and then click Copy. Your file has now been copied. If you would like to copy, move, or delete folders and files in bulk in Procorem you can use the Bulk Actions button present in each folder. | |
8. | How do I download a document? |
To download a document from one of your WorkCenters, navigate to the WorkCenter storing the file you would like to download. Select the file, then simply click on the file. It will automatically download to your computer. | |
9. | How can I upload a new version of a file that is already in my WorkCenter? |
Once you are in the appropriate WorkCenter, click Upload Files in the middle of the screen. Click Choose File. Select the updated file that you want to upload, and then click Upload. 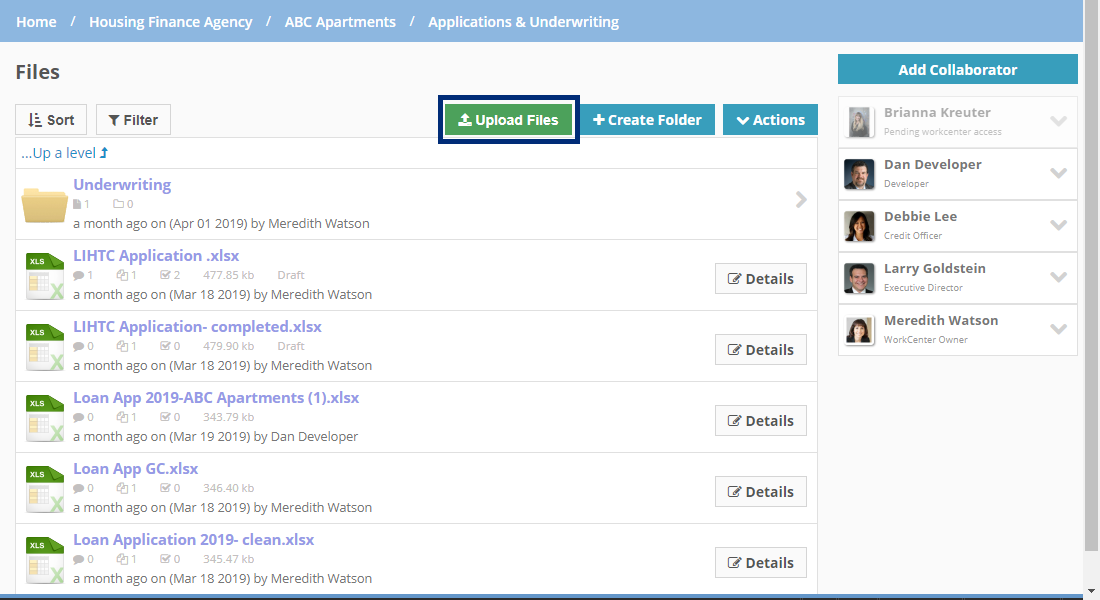 You can also upload new versions right from the file details screen. 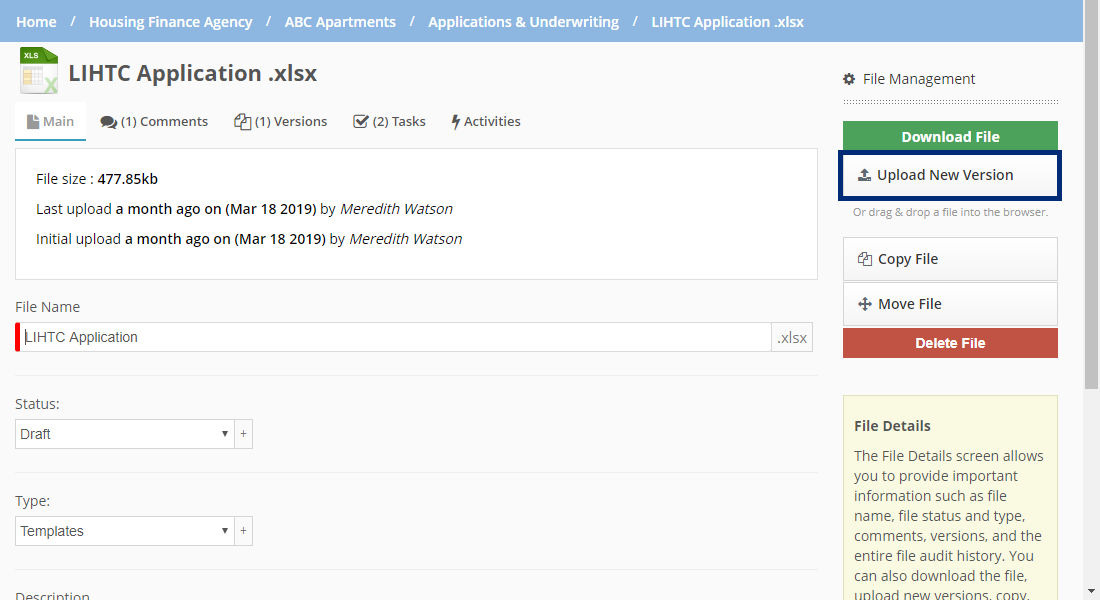 Procorem will automatically save the updated document as a new version of the old one. NoteThe file name of the updated document must match the file name of the original version already loaded into Procorem for versioning to occur. | |
10. | How do I comment on a file or document? |
To add a comment to a document or task in Procorem, head to the document or task you would like to comment on and navigate to the Comments tab on the top of the page. From there you can easily make new comments to post around that document or task. 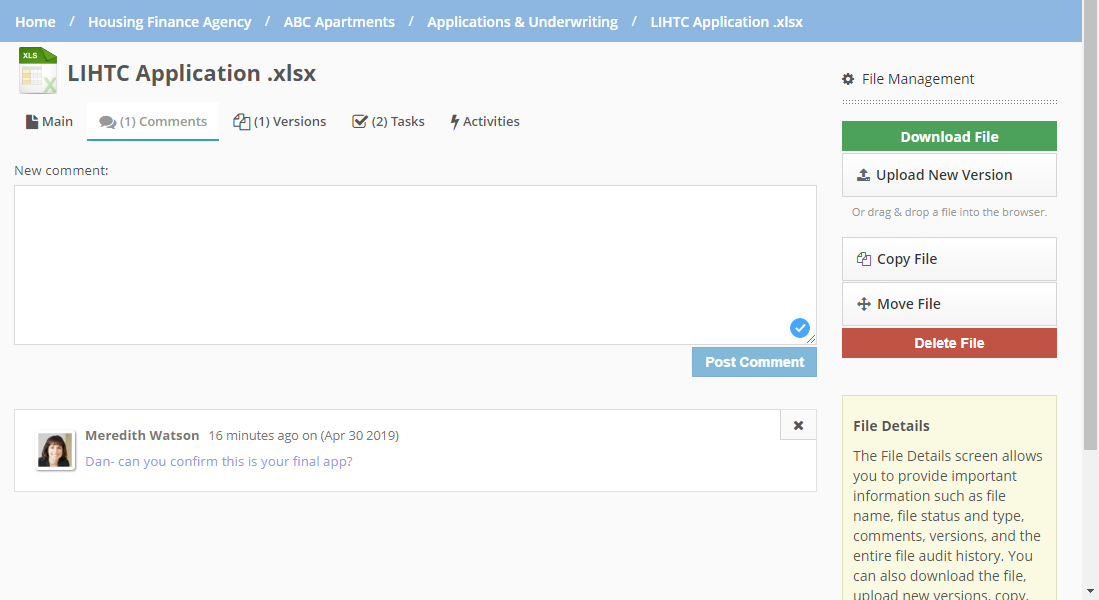 | |
11. | How do I create, assign, and approve tasks? |
First log into Procorem and navigate to the WorkCenter of your choice. Tasks are managed directly within the WorkCenter under the tasks tab. Once in the WorkCenter, click Create New Task to begin creating a new task. 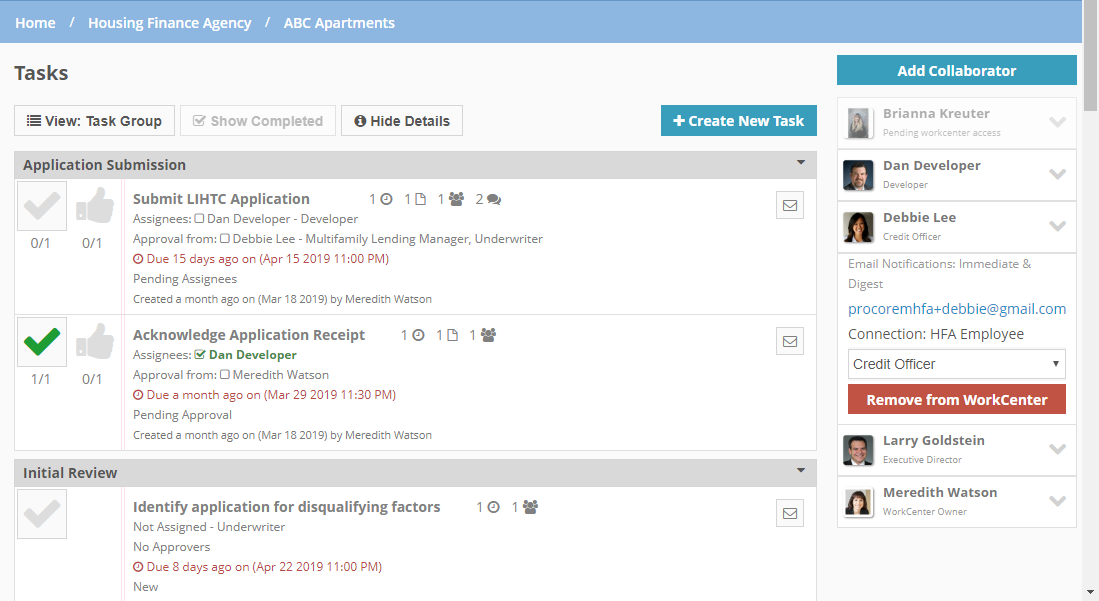 The only information required to create a task is a Task Title, but below that is where the power begins!
When you are done with your task, don’t forget to save the task so it is entered into the system completely. |