Introduction to Account-Level Data Views
Procorem includes account-level data views, which allow you to search, analyze, and report on information across the account. With data views, you can add or remove columns, sort, filter, and group columns, and navigate to a data record from the view.
Account data views include:
The data refresh process starts approximately every five minutes. The process end time varies. Please refresh the page if data appears incomplete.
Security
Data views are visible to any user on the account. The records (rows) displayed depend on the user's WorkCenter access. For example, if the user is a collaborator on one WorkCenter, they will see only the records of that WorkCenter. Account and WorkCenter administrators will see files for all active WorkCenters on the account.
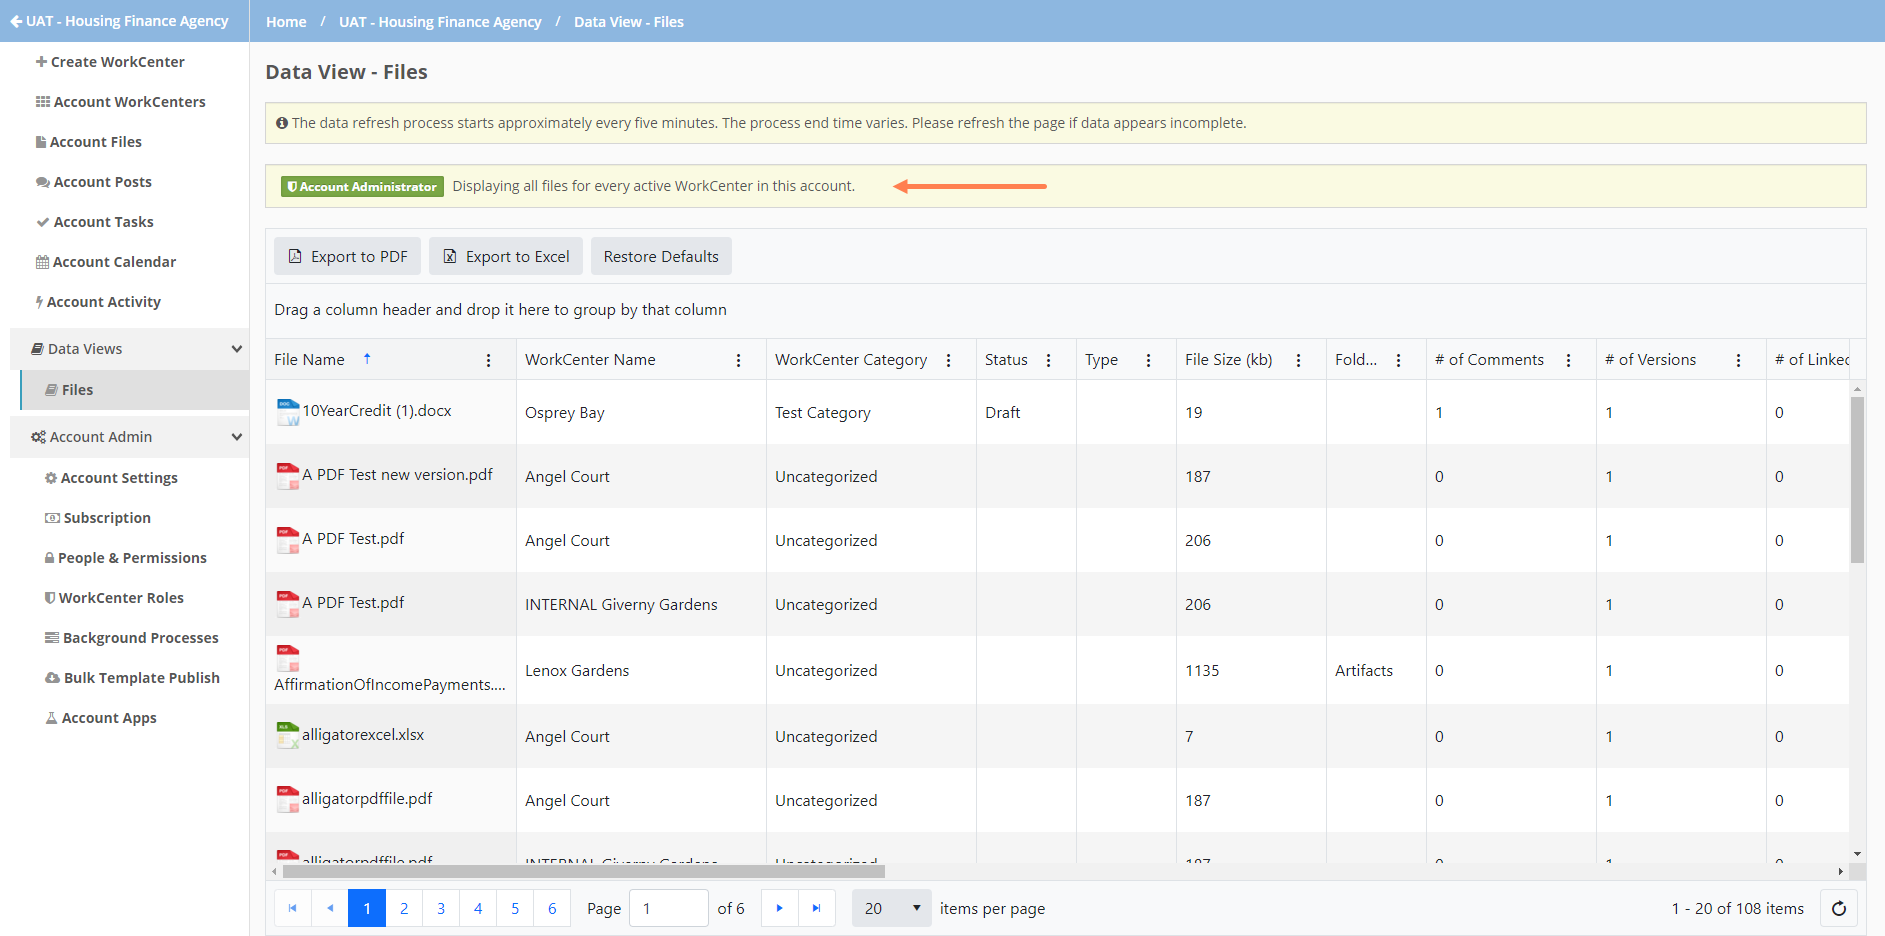
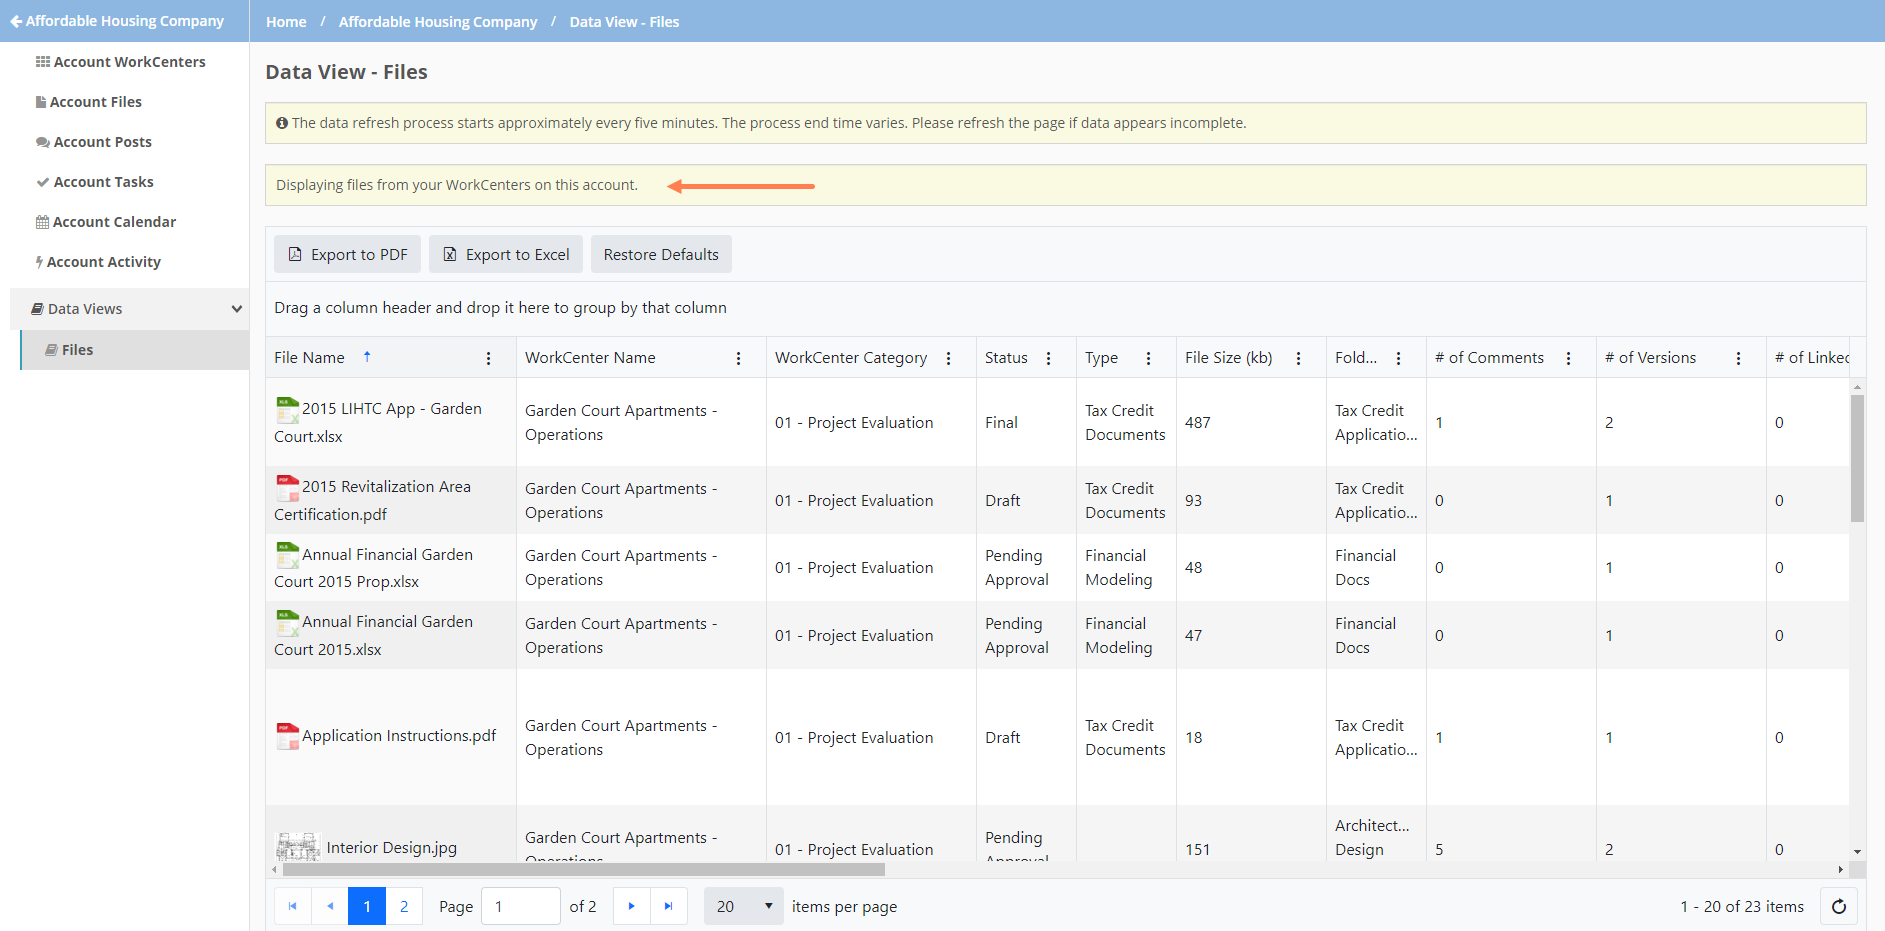
Account Administrator access; Restricted collaborator access
Navigation
You can find the data views in the left navigation panel of an account. The Data Views menu is expandable and collapsible.
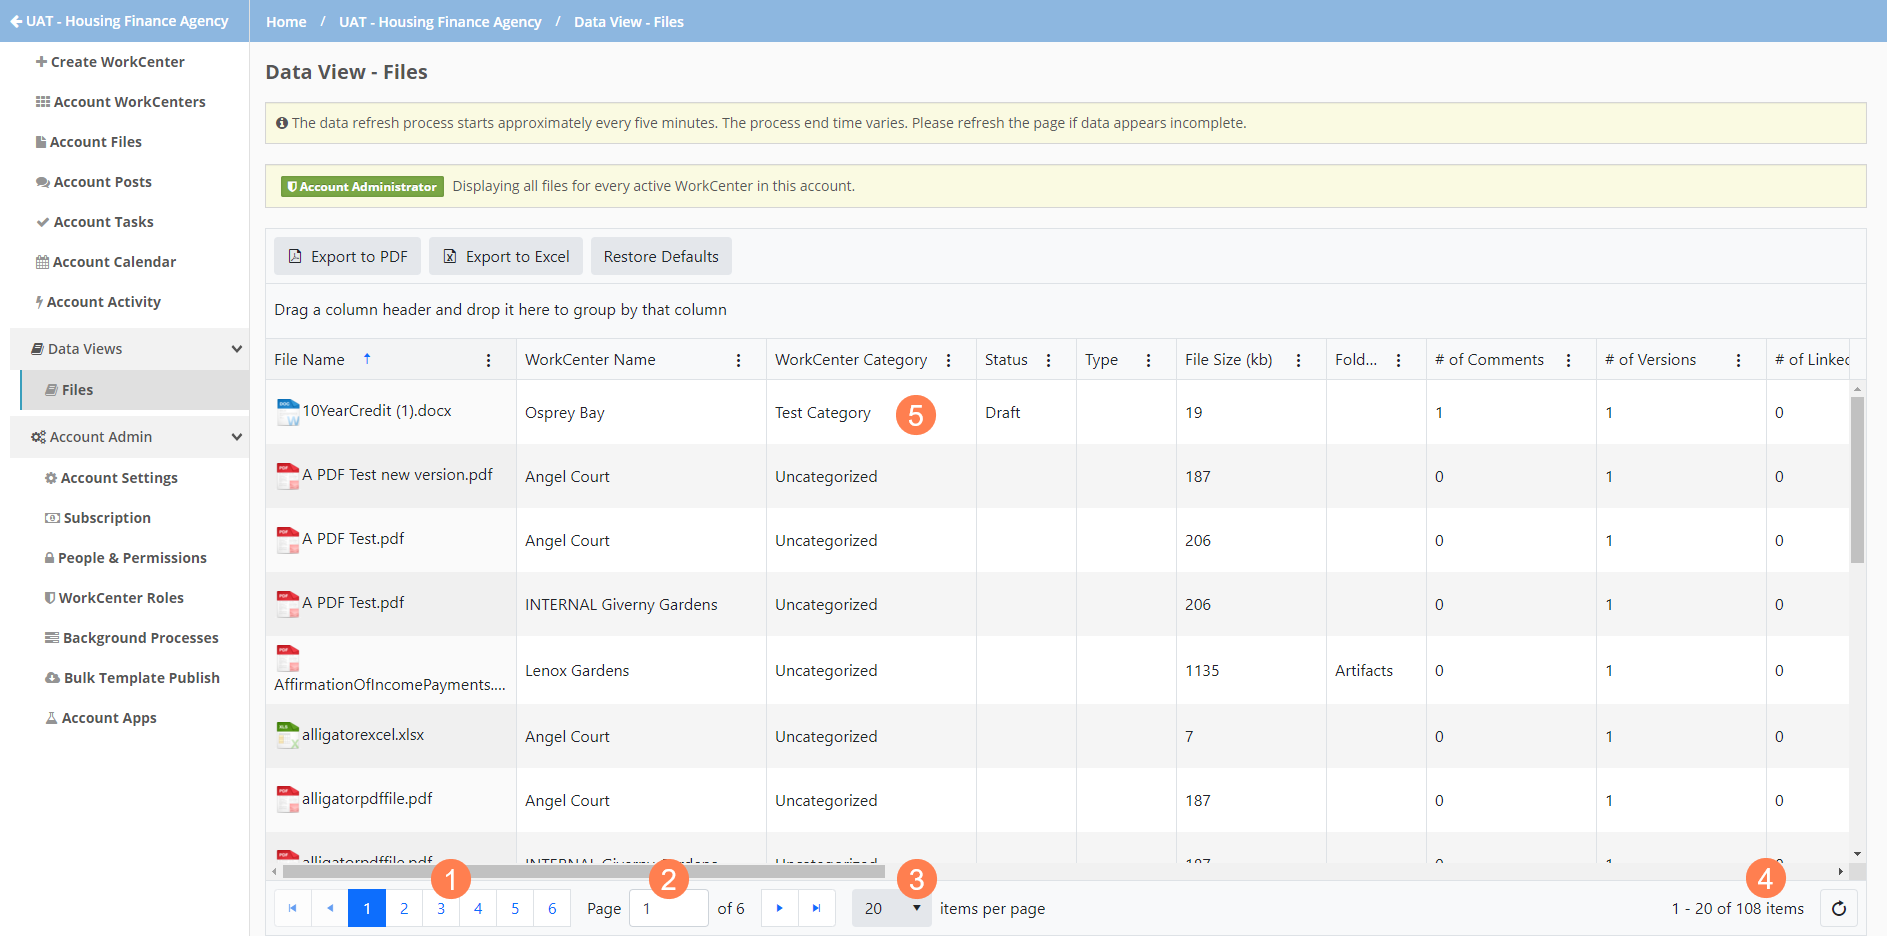
From a data view, you can:
Select the page to view.
Enter a specific page to view.
Specify how many records to view per page.
See how many records are in the data view.
Click a row to navigate to the details for that particular record.
Files—Edit Files page
Tasks—Edit Task page
Posts—Edit Post page
Collaborators—WorkCenter landing page for the collaborator
WorkCenters—WorkCenter landing page
Data View Tools
Procorem data views offer a number of tools for customizing the view and managing the data in the view.
All columns are visible by default. Using the header menu  , you can select and clear the columns shown on screen. Your selections will be saved if you leave and return to the data view.
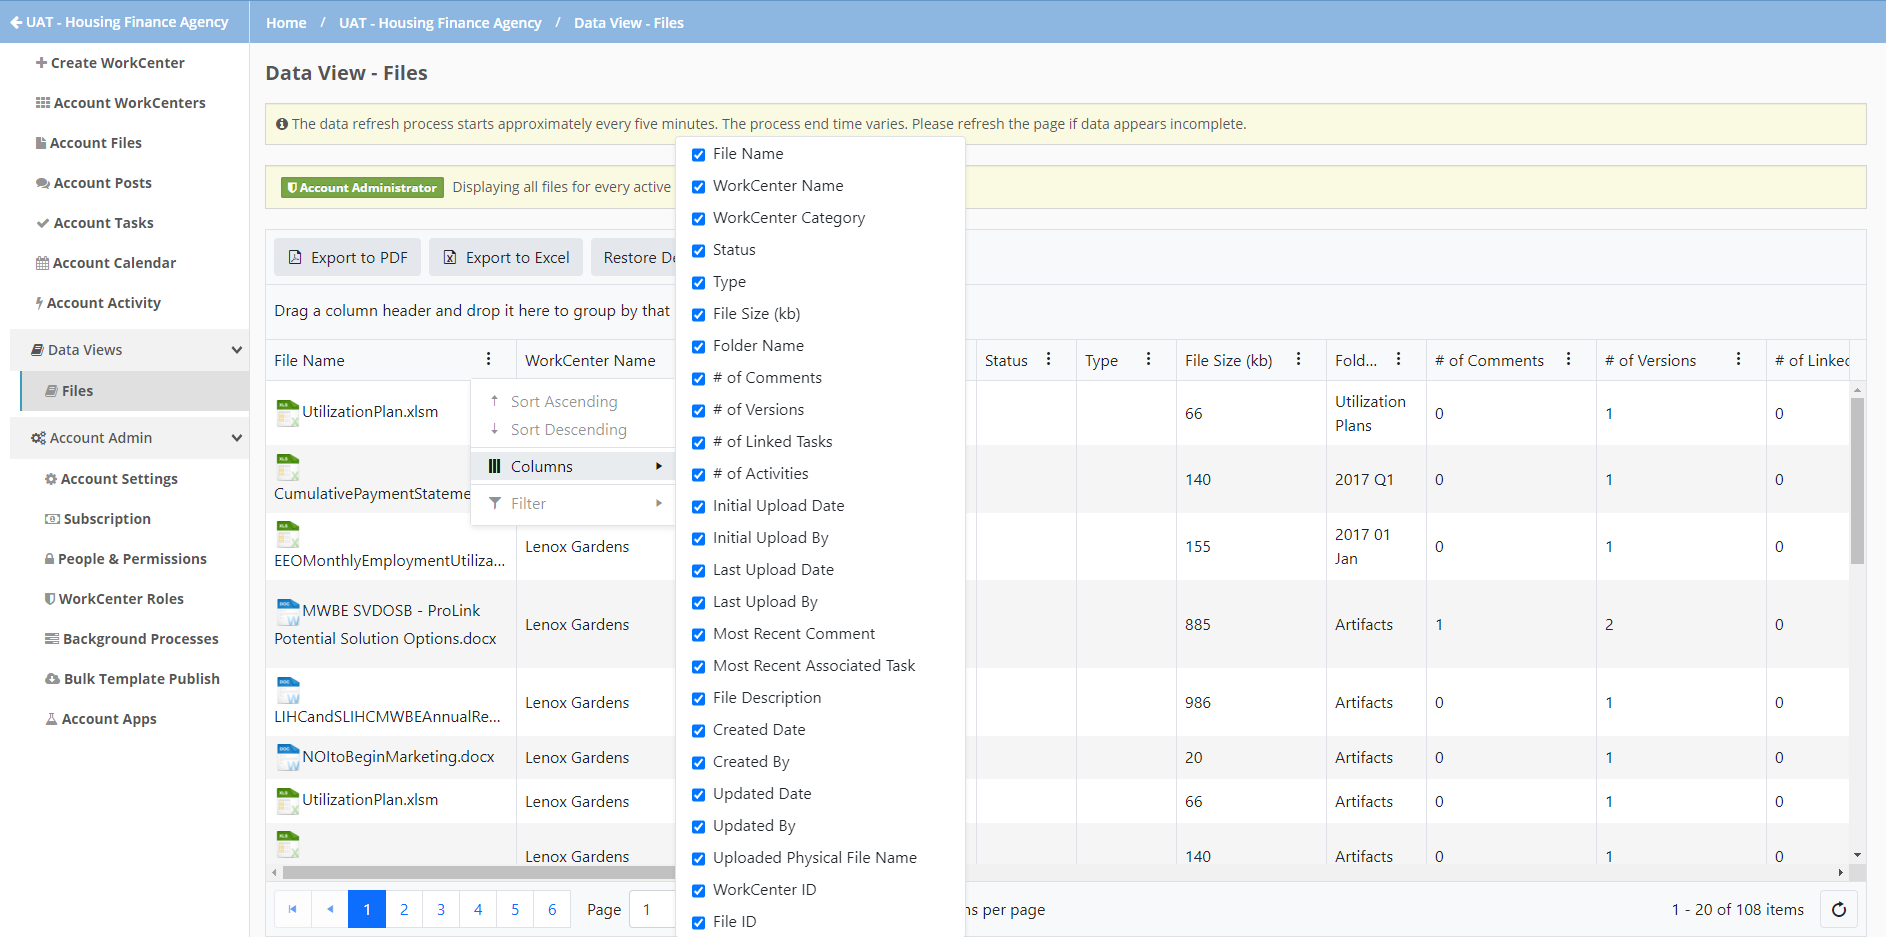
Drag and drop the column headers in the grid to change the column order. Your selections will be saved if you leave and return to the data view.
You can drag and drop a column to the grouping area to group records by the column. One column can be grouped at a time. Your selections will be saved if you leave and return to the data view.
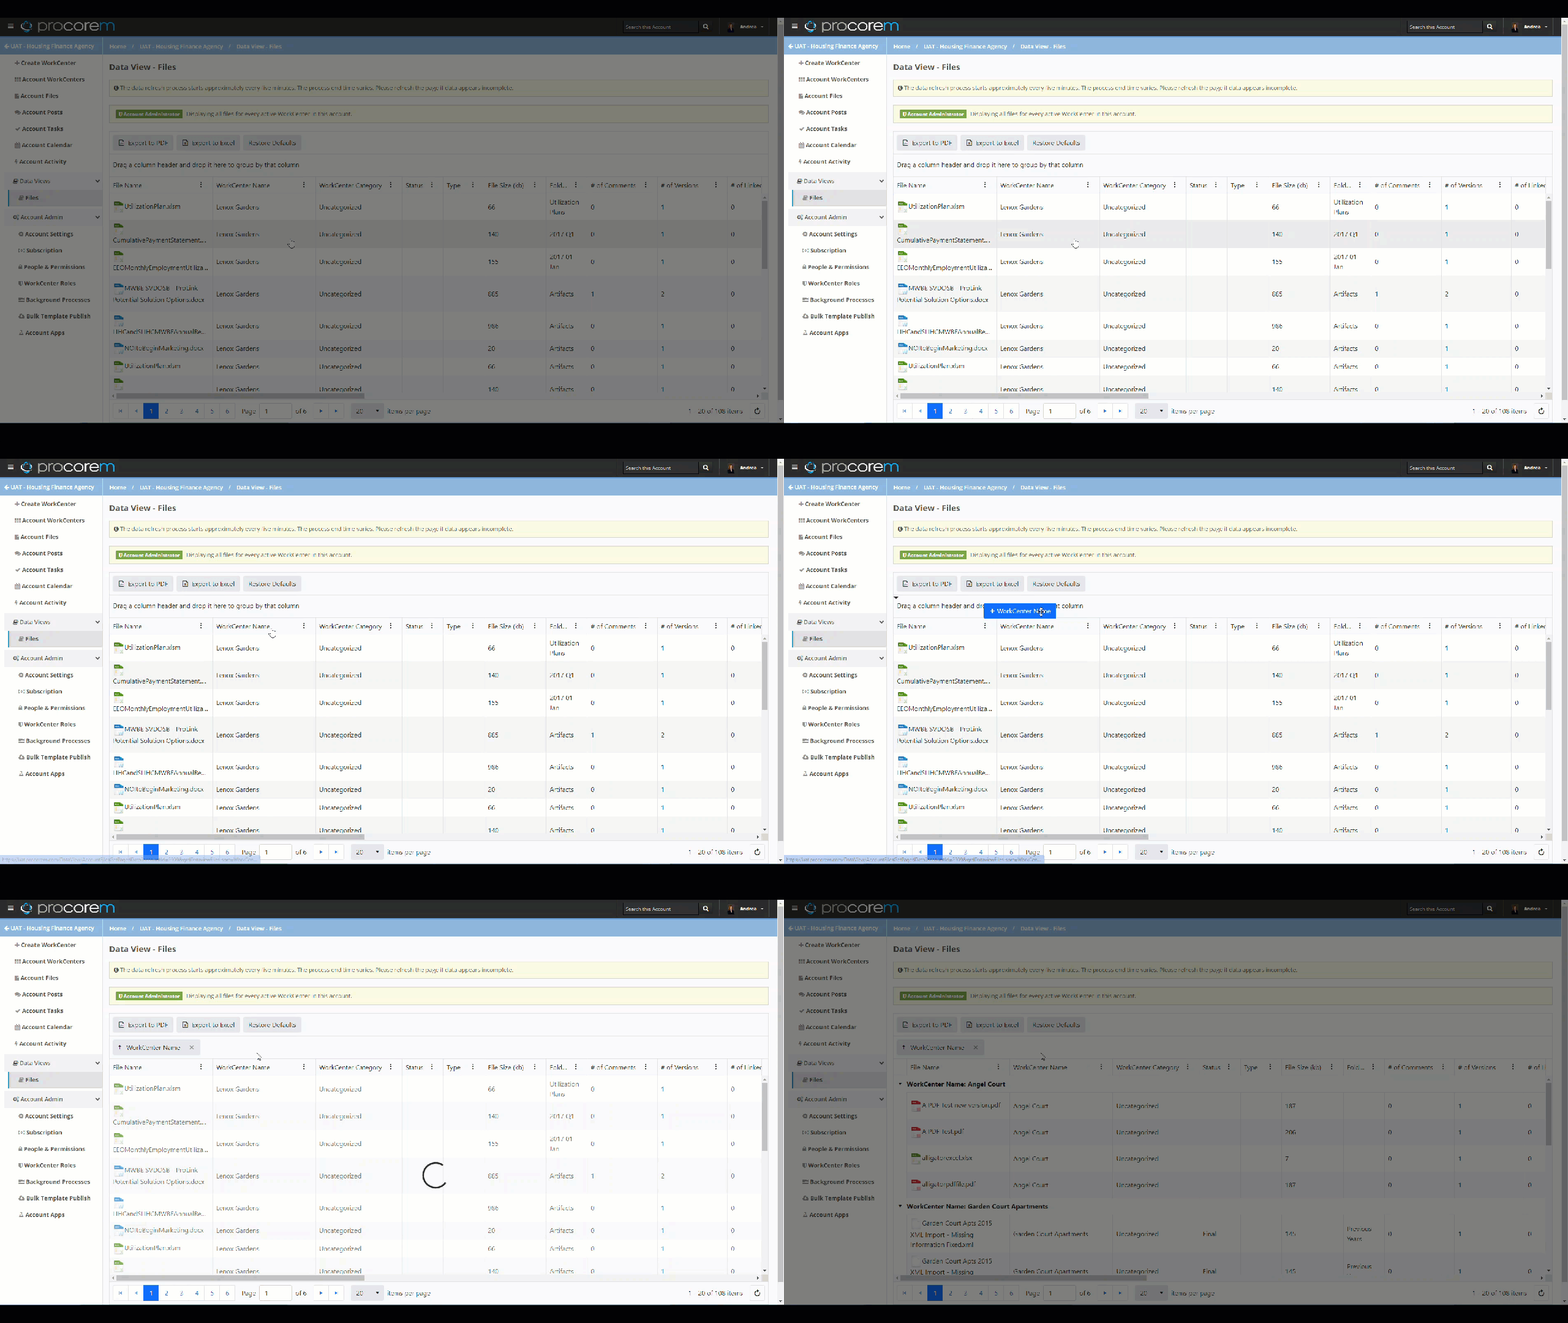
Click the X next to the column in the grouping area to remove the grouping.
The default sort depends on the data view:
Files—File name
Tasks—Task title
Posts—Plain text
Collaborators—Collaborator name
WorkCenters—WorkCenter name
One column can be sorted at a time. Using the header menu  , you can change the sort of the data (sort ascending, sort descending). Alternatively, you can click the column header name to change the sort for a column. Your selections will be saved if you leave and return to the data view.
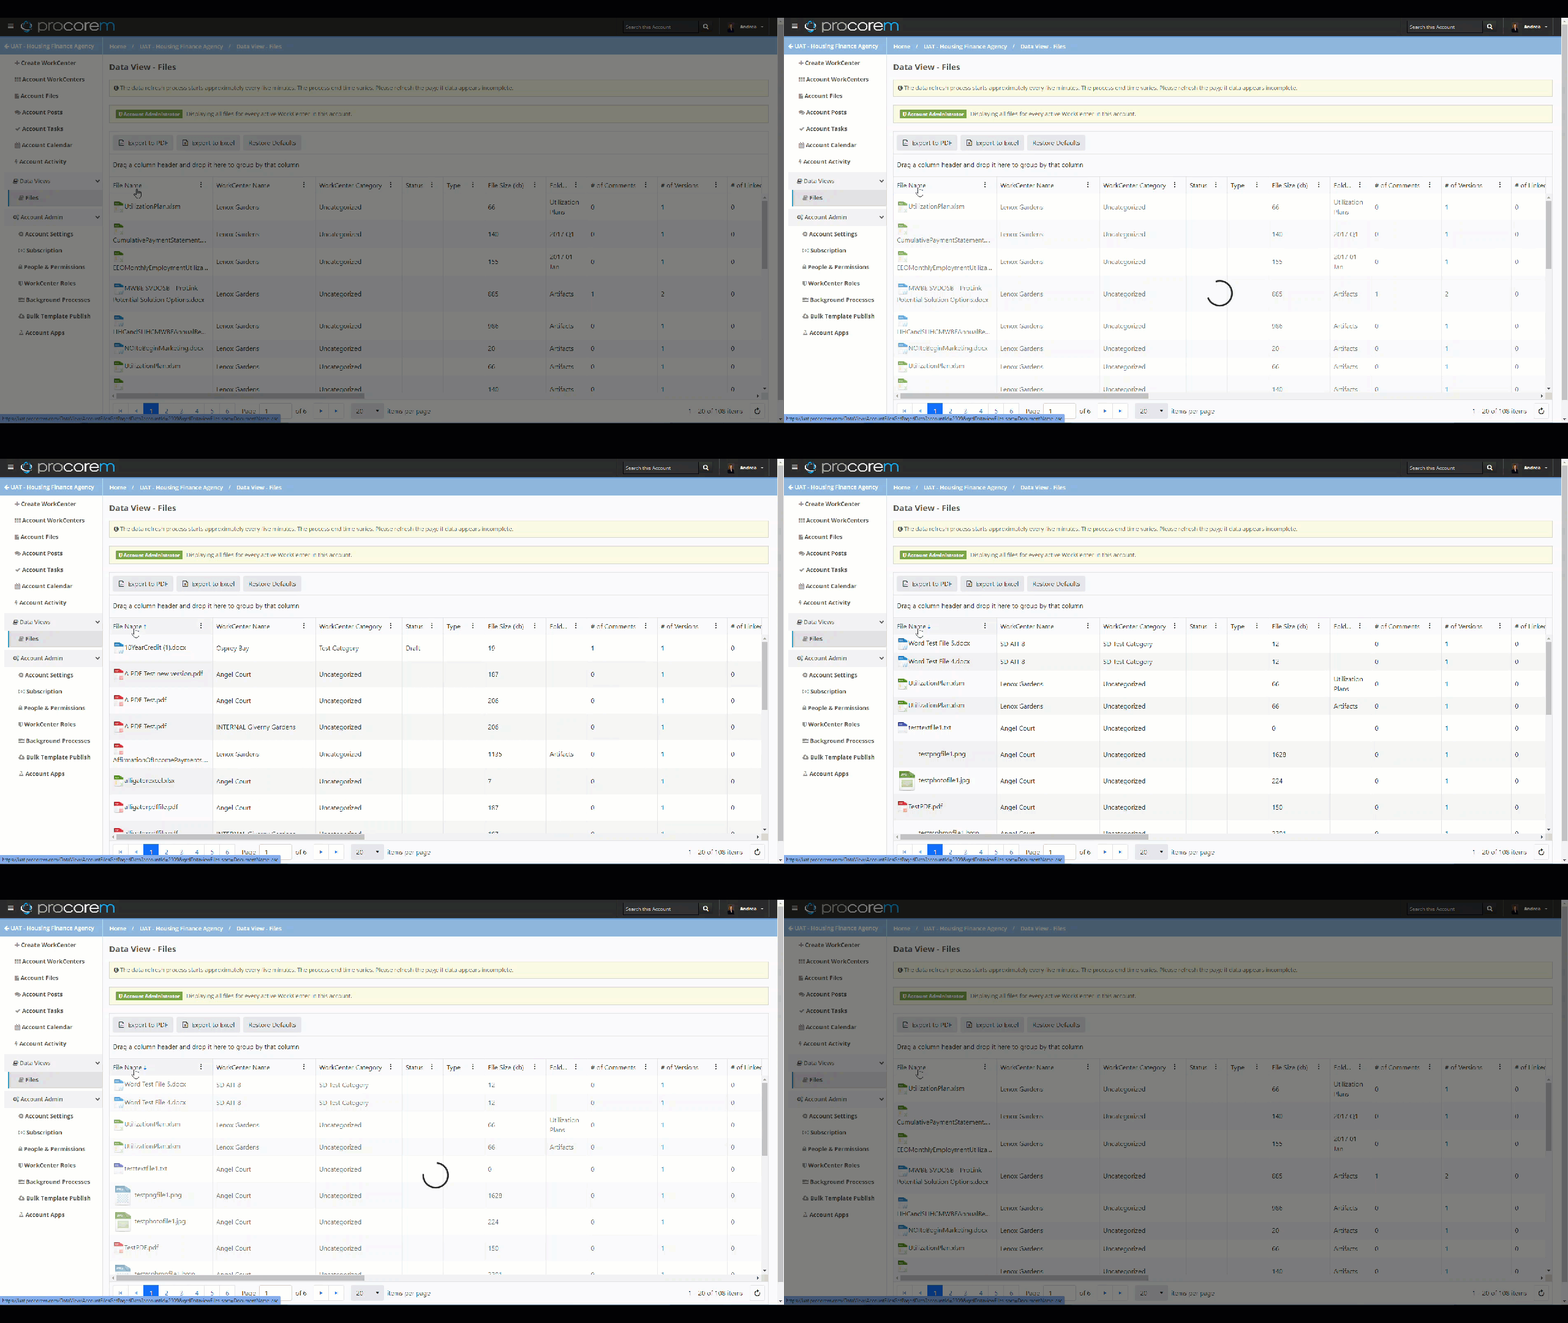
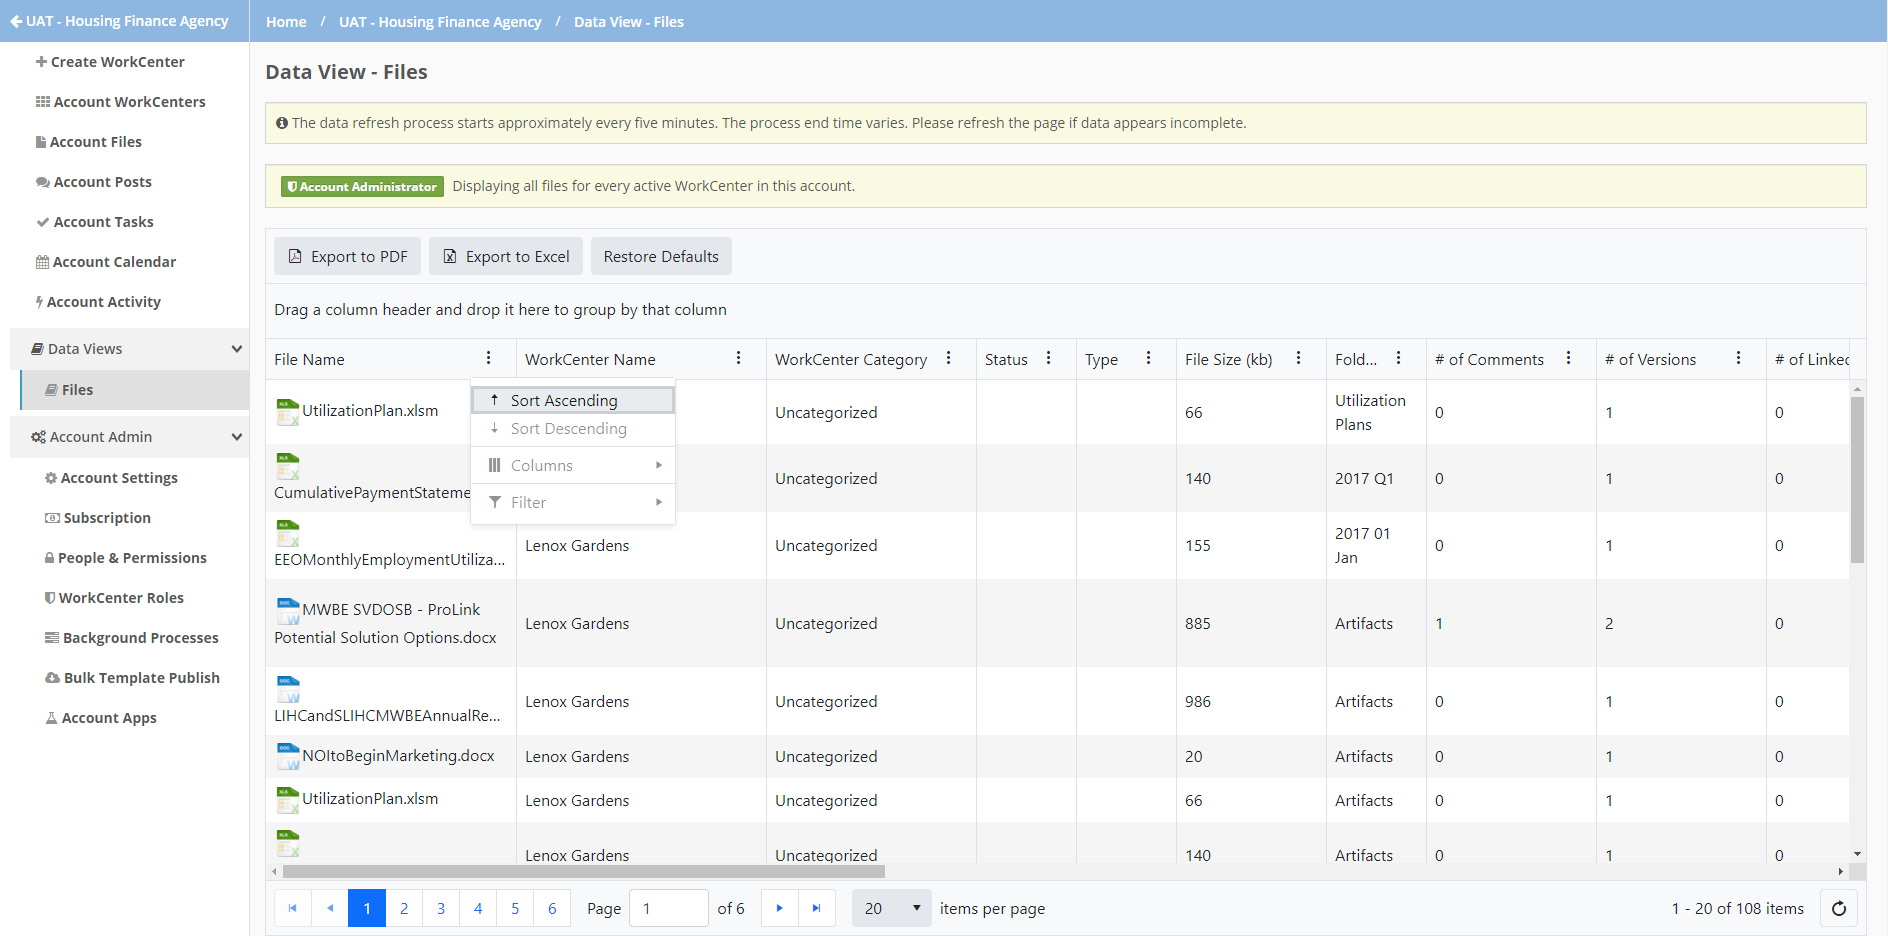
Options for sorting a data view
When you sort by a user name column, such as Initial Upload By, the sort occurs by first name.
Using the header menu  , you can filter the data.
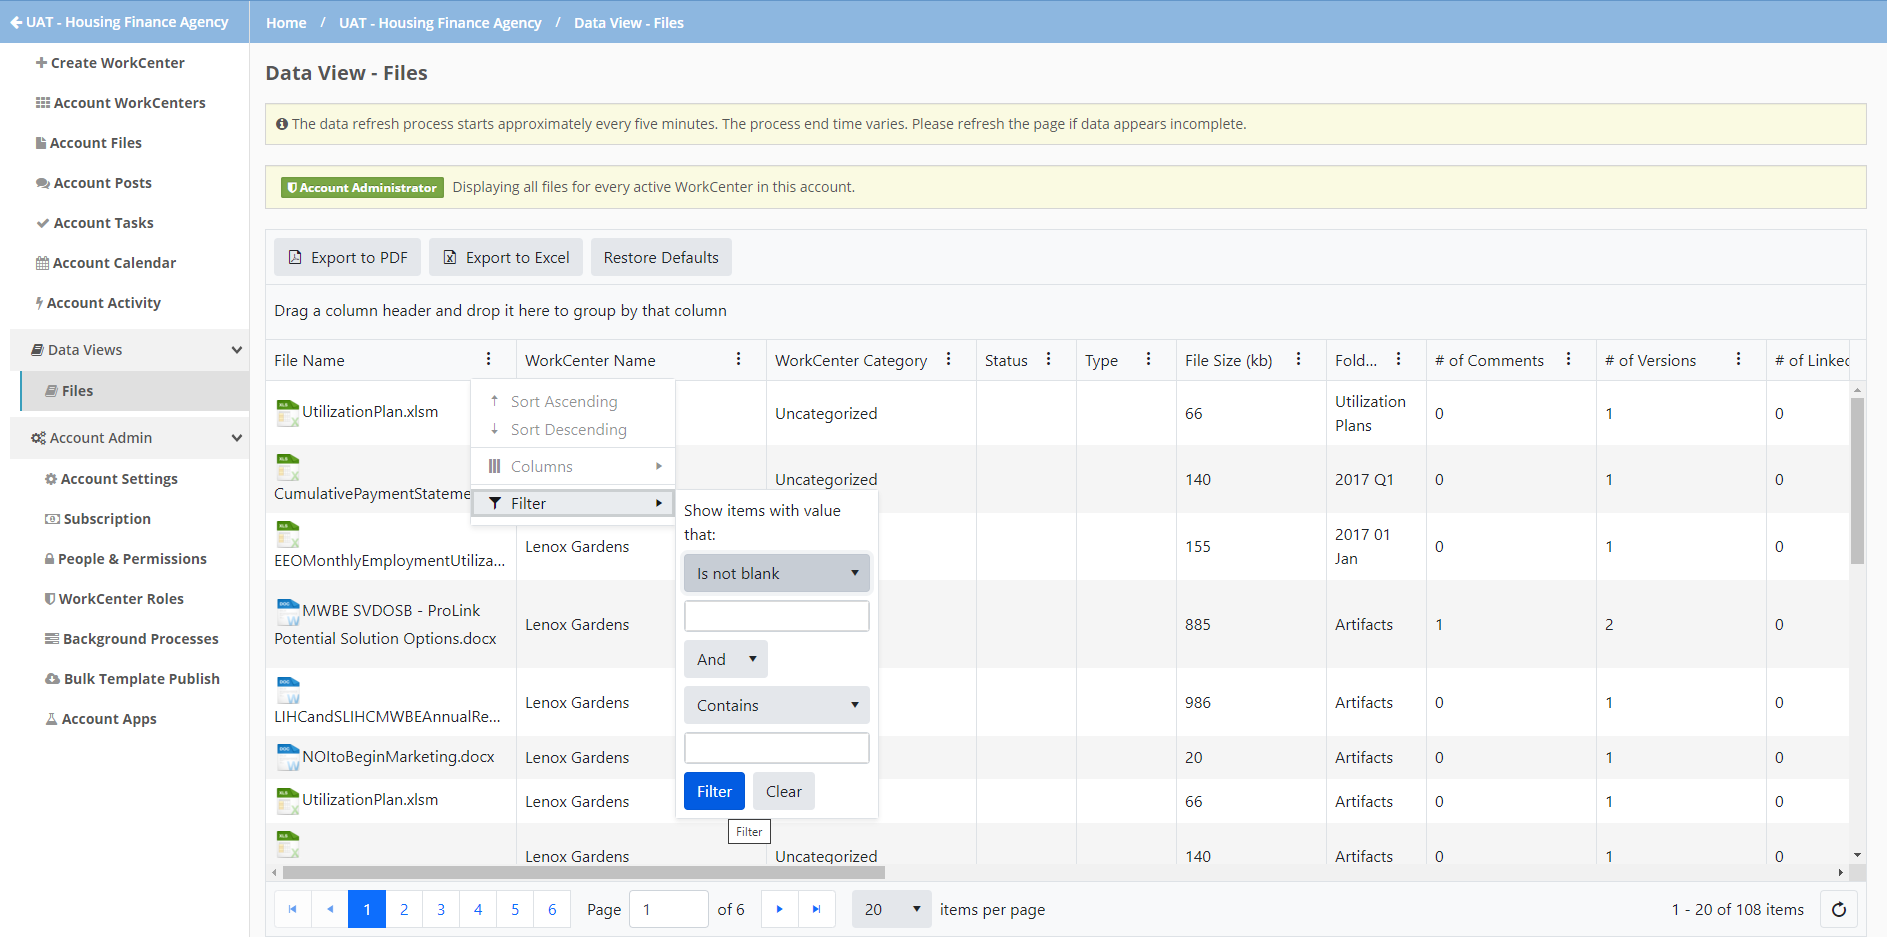
The filter options available depend on the format of the column.
Text fields can be filtered to show records that Contains, Starts with, Equals, Does not equal, Does not contain, Ends with, Is blank, Is not blank. You can then the enter the value to use in the filtering.
Picklist fields (drop-down) can be filtered to show all, one, or multiple of the picklist values.
Numeric fields can be filtered to show records that Is equal to, Is not equal to, Is greater than or equal to, Is greater than, Is less than or equal to, Is less than, Is null, Is not null. You can then enter the value to use in the filtering.
Date fields can be filtered to show records that Is equal to, Is not equal to, Is after or equal to, Is after, Is before or equal to, Is before, Is null, Is not null. You can then enter or select the date to use in the filtering.
Checkbox fields can be filtered to show records that are selected (Yes) or cleared (No).
Your selections will be saved if you leave and return to the data view.
If you hide a column that has had filtering applied, the filtering persists. Keep this in mind if it appears data is missing from the view.
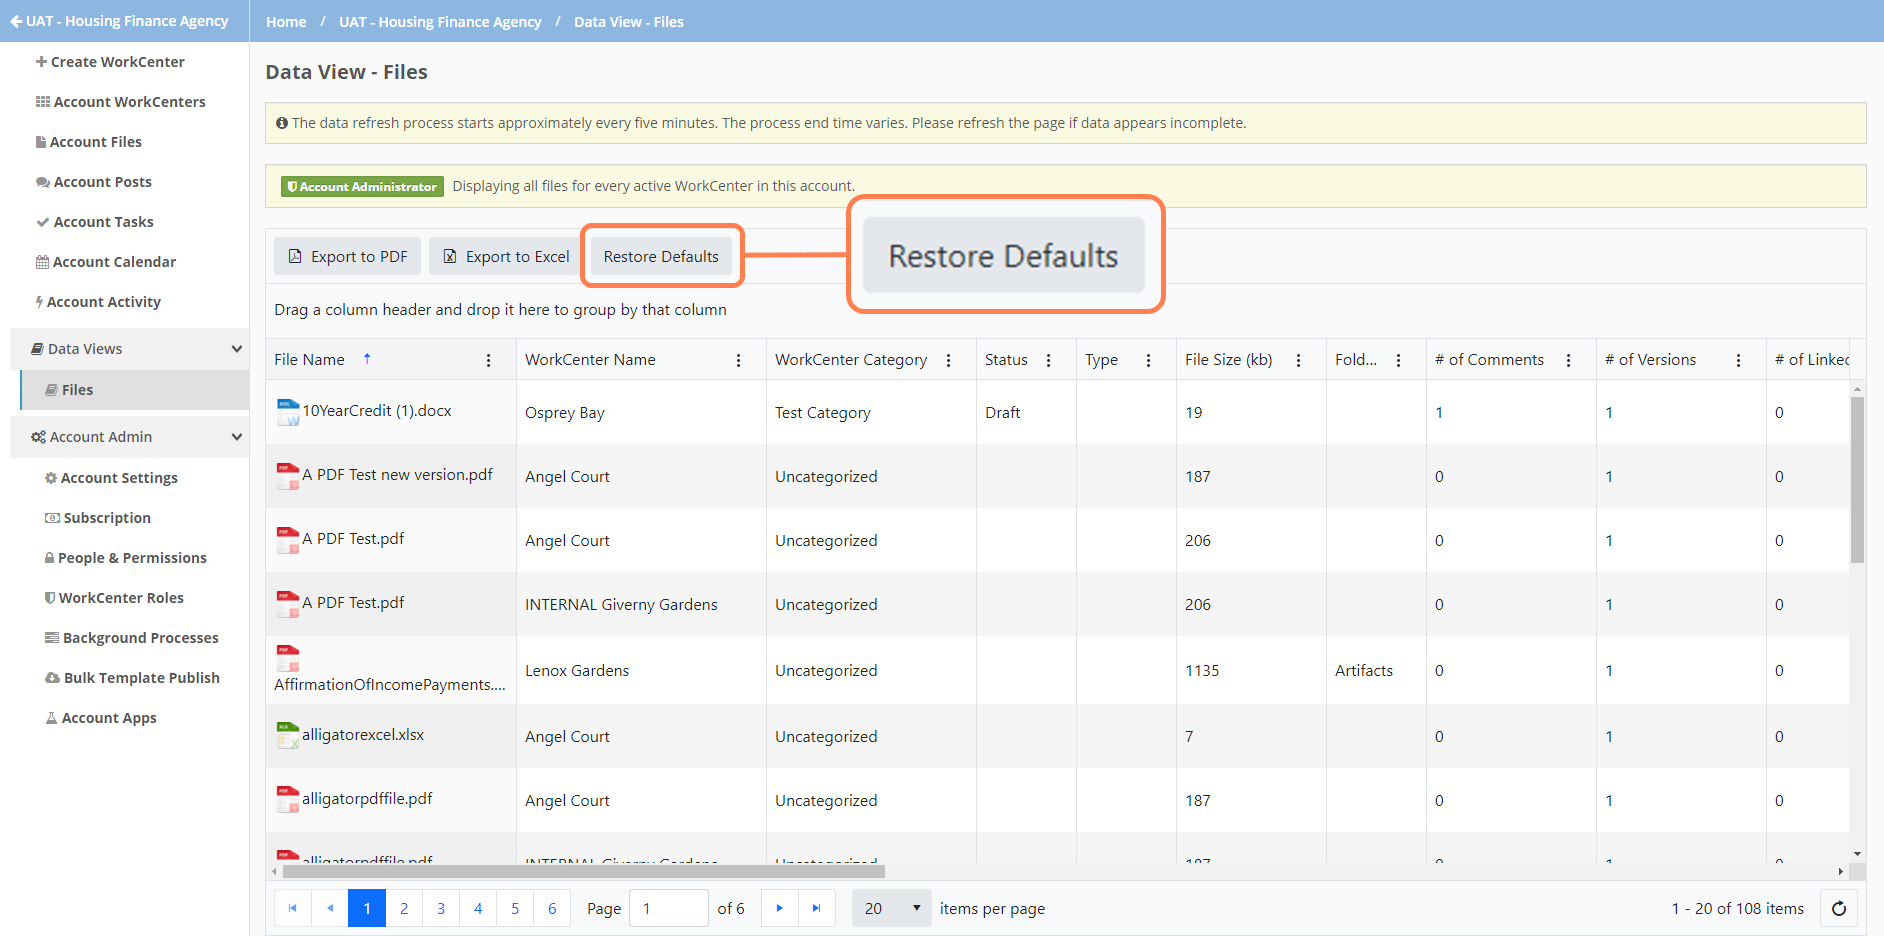
If you modify the data view, you can restore the data view to the default view.
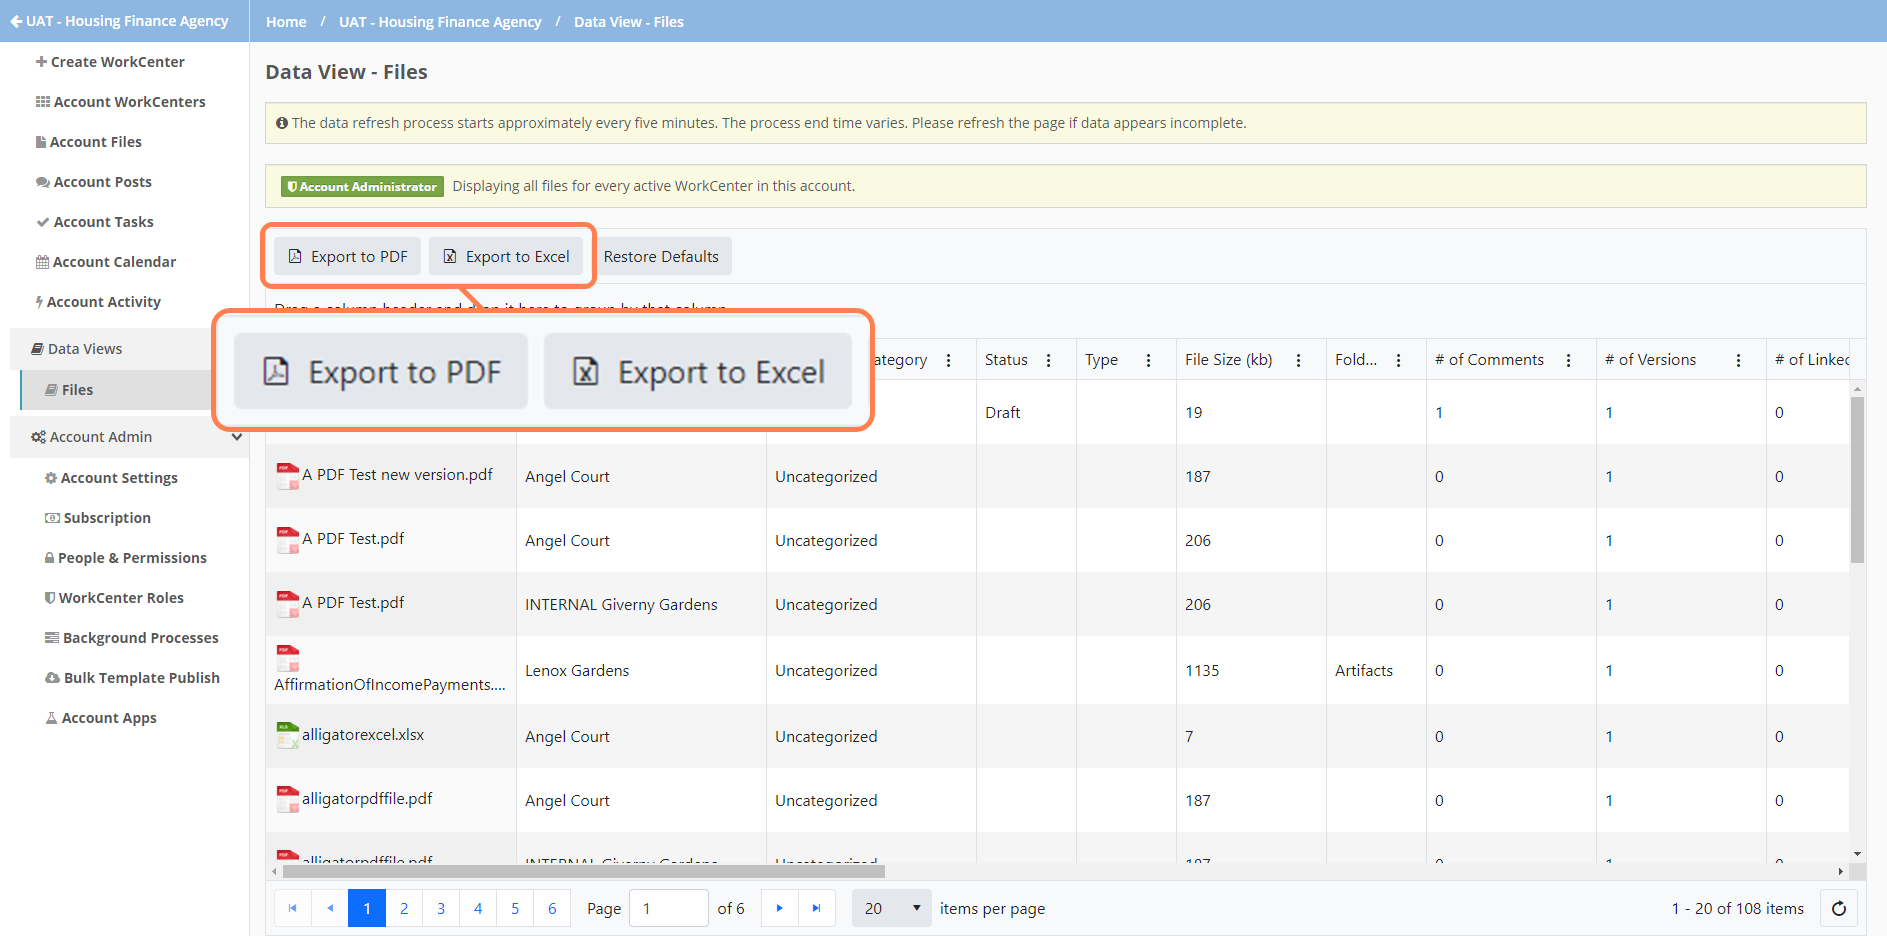
You can export the data to PDF and Microsoft Excel.
