Setting up Folders
Folders in Procorem tie directly to particular WorkCenters. Once you set up a WorkCenter to store core project data, you can create a completely customized folder structure to match your needs.
Security in Procorem is controlled on the WorkCenter level, not in folders. This is intentional as managing security on a folder level is often burdensome and leaves organizations with a potential security risk. In Procorem, only the people you invite to the WorkCenter can see and engage with information on that WorkCenter, including Files and Folders. To learn more about Procorem security, take a look at the Security, Permissions, and Guests section. If you would like to learn about setting up customized security roles, see the WorkCenter Roles section of the Help Center.
Create a Folder
Important
Only members with the correct WorkCenter privileges have the ability to create new folders. Check out the WorkCenter Roles section to learn more.
Navigate to the WorkCenter where you want to create a folder, and then click Create Folder in the middle of the screen (it is designated with a plus sign). Once you click the button, a window will appear asking you to name the folder.
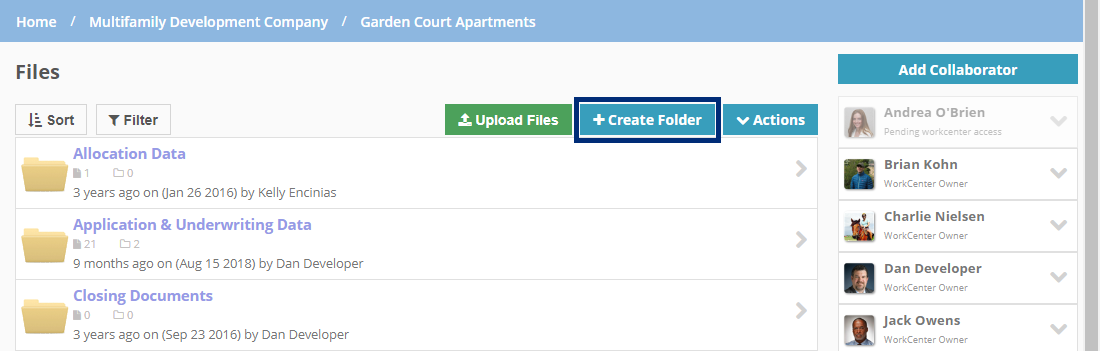
Enter the name of the folder, and then click Save.
To create sub folders, navigate into the top-level folder and follow the same process.
Procorem has no restriction on the levels of folders you can create in a WorkCenter.
Delete a Folder
Caution
Deleting a folder cannot be undone. Procorem and it will delete the folder and all contents within the folder.
Navigate into the folder you would like to delete.
Click Actions, and then click Delete this folder.
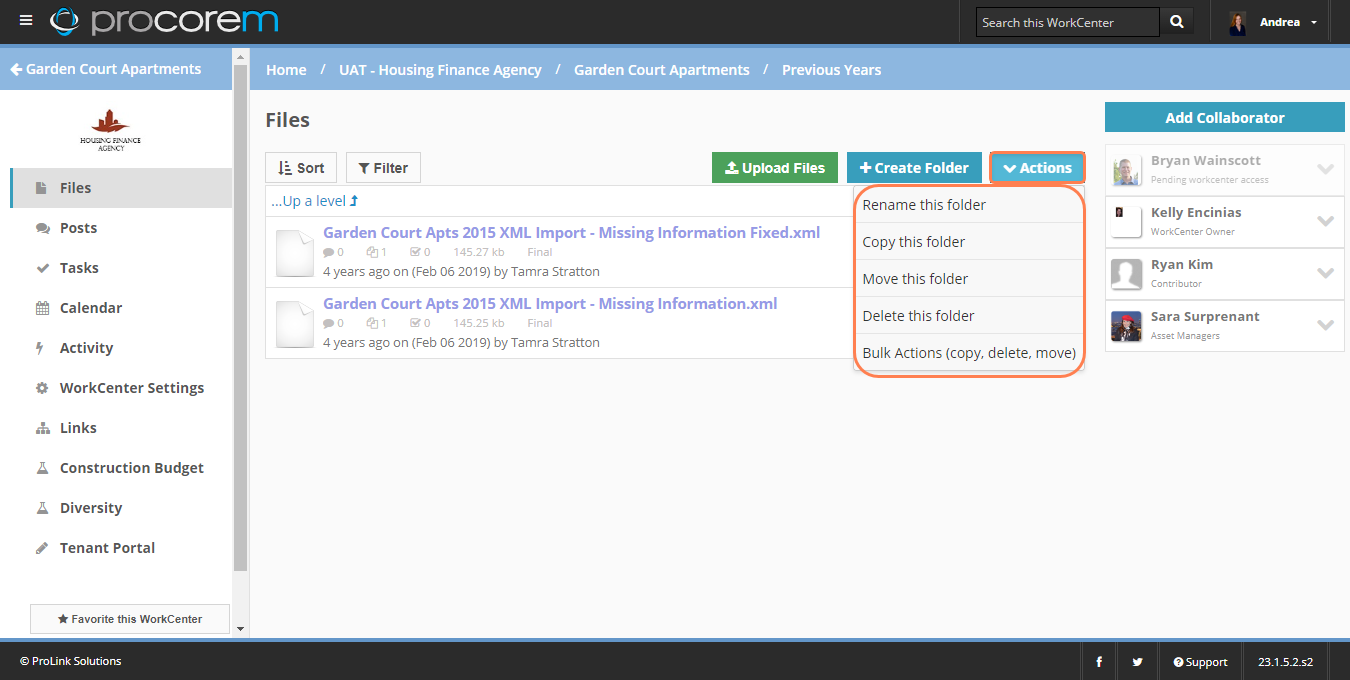
Confirm that you would like to delete the folder and its contents.
Rename a Folder
Renaming a folder works very much the same as deleting a folder. Select the folder you would like to rename, and then click Action. From there, click Rename this folder, provide the new name, and click Save.