Manage Tasks
Navigate to the WorkCenter (project), and then click Tasks in the left navigation menu.
The Task screen opens.
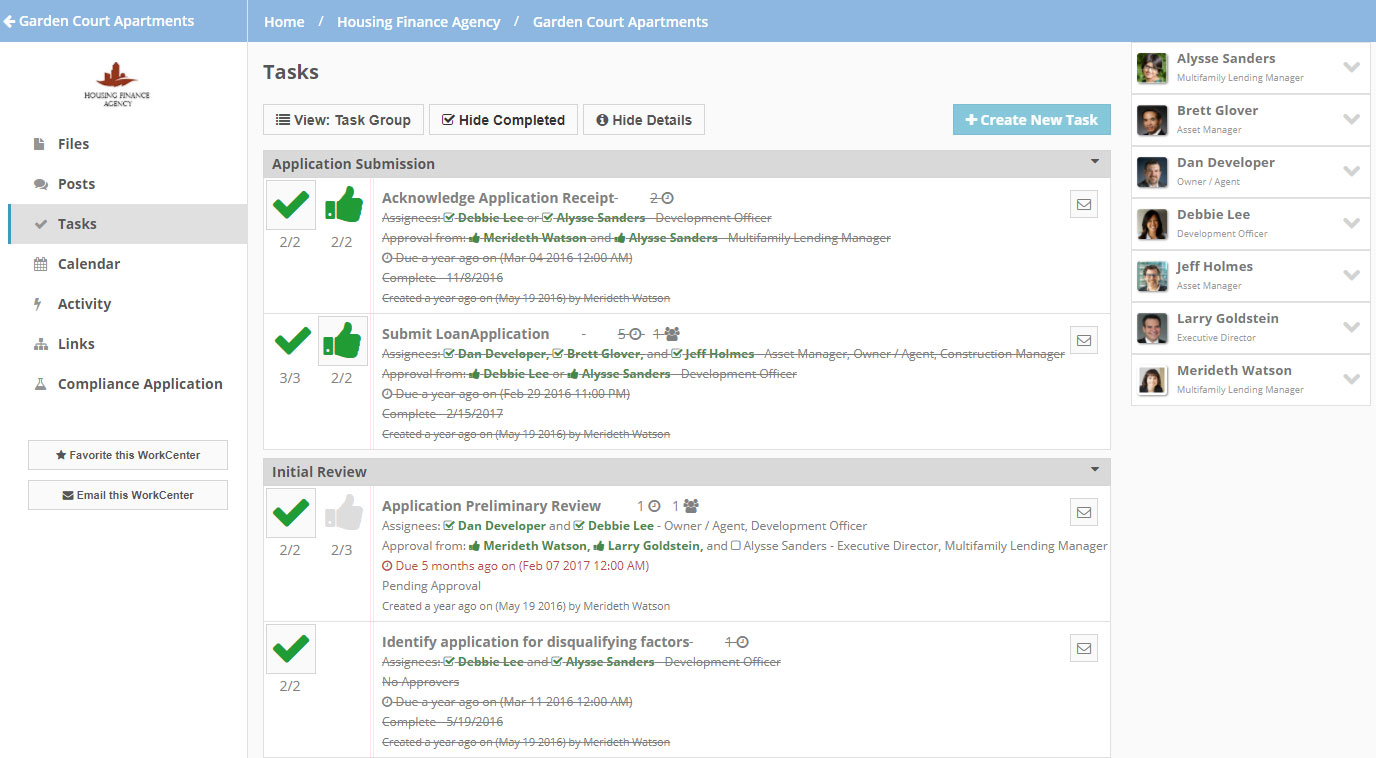
Click Create New Task.
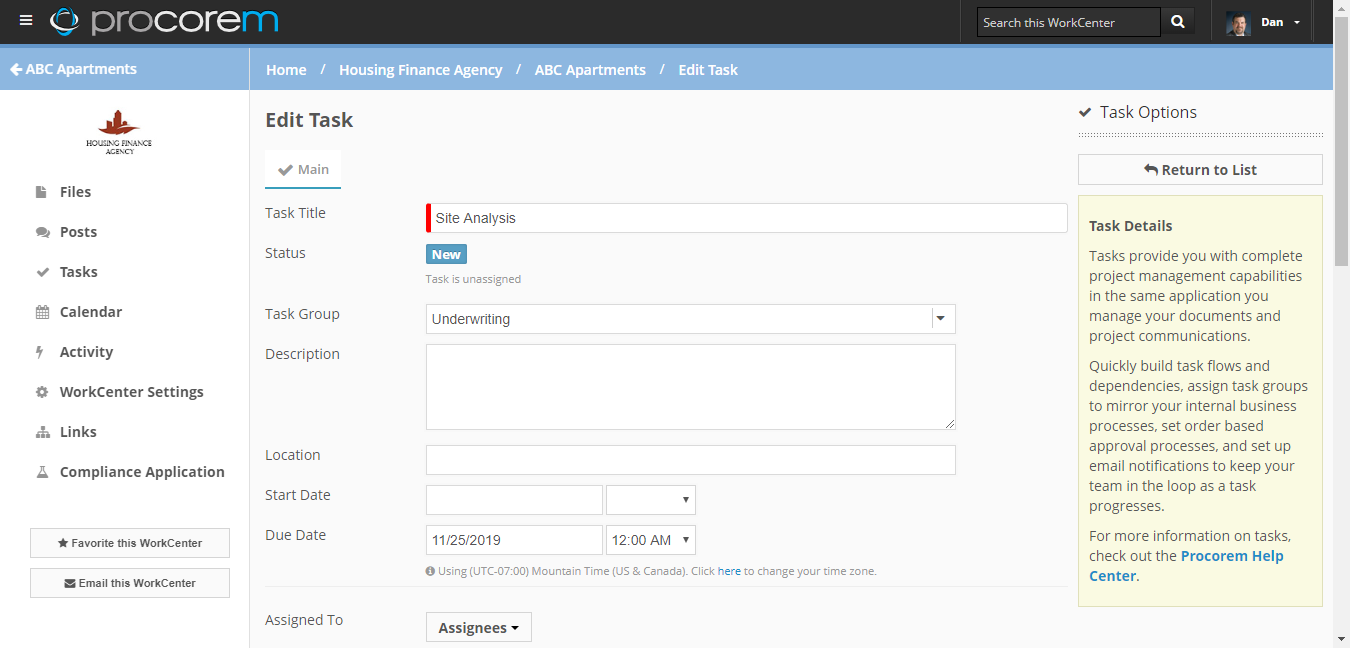
Enter the Task Title.
Optionally, select the task group for the task.
Task groups allow you to create custom groupings to better organize your tasks. To add a new task group, select the drop-down, and then click
 .
.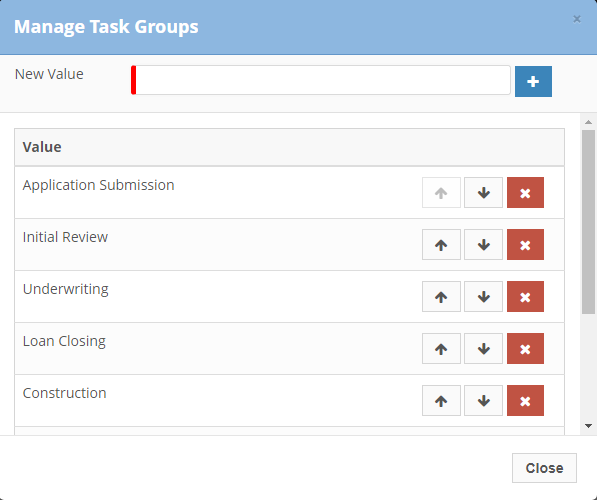
Enter the task group name, and then click
 . In addition, you can manage your task group ordering, or delete an existing task group.
After you are happy with your task groups, close the window and select the desired task group for this task.
Note
You only have to create task groups once; they remain in the application, tied to the particular WorkCenter. If you would like to see a common set of task groups across all WorkCenters, first create it in a WorkCenter, and then use the template functionality to copy it to the appropriate WorkCenters.
Optionally, provide information about the description, location, start date, and due date for the task.
By selecting a due date, your task will appear on the Calendar. If your start date and end date are far apart, they will show on the Calendar in one long task spanning across multiple hours or days. If you just want to see the Due Date on the Calendar, only fill in the Due Date when creating the task.
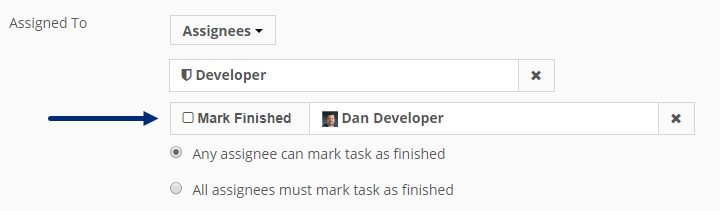
Optionally, select the assignees for this task. Then select whether any assignee can finish the task or all assignees must finish the task.
You can select from any collaborators on the WorkCenter or select a role on the WorkCenter to assign the task. If you select a role, the role will be added to the task and all users with that role will be added to the task as an assignee as well.
Tip
Assigning roles to tasks is especially powerful because any future project members with that role will be automatically added to the task when they are added to the WorkCenter. This works great to make sure new project members are brought up to speed right away and is also the best way to prepare a template.
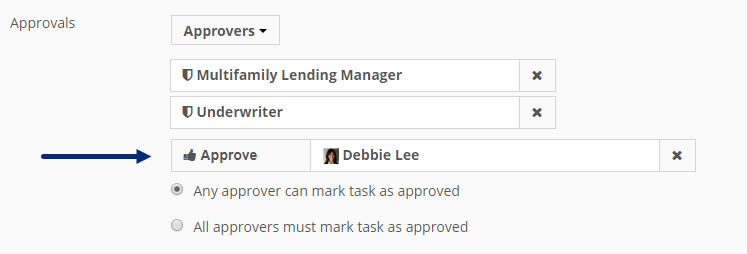
Optionally, select any approvers for this task. Then select whether any approver can approve the task or all approvers must approve the task.
If you indicate all approvers, the task must be fully approved before the task can be marked as Completed. Drag and drop the approvers to ensure a proper approval flow.
You can select approvers by collaborator name or by project role.

Optionally, add followers who should remain aware of a task's progression through email notifications. These are members of your team not involved in finishing or approving the task, but are team members who you would like to remain aware of the task’s progression.
Optionally, specify the order in which tasks are performed. This controls how tasks are displayed to your team members in the main Task Screen. Enter in numbers starting with “1” in this field and your tasks will respect that ordering.
Note
Due Dates supersede Sort Order. If you are managing your tasks with tangible Due Dates it is recommended to leave the Sort Order field blank.
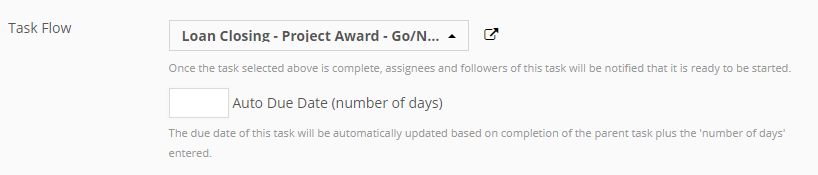
Optionally, specify an automated and controlled order of completion for your tasks. As you begin to create multiple tasks, they will show up in the Task Flow list.
Select the task from the list that you would like to precede the task you are creating. By selecting a task, Procorem ensures that the previous task is completed before you can complete the current task you are on. Further, when the prior task is completed, email notifications will be sent to all the assignees on the current task that it is time for them to get to work.
You can also set an Auto Due Date in the task flow. Entering a number in this field determines the number of days after the completion of the previous task that the current task is now due. If you already have set a due date for this task, then it is not necessary to enter anything in the Auto Due Date field. If you have information in both fields, the task due date will be reassigned when the prior task is completed based on the number you enter in the Auto Due Date field.
Click Save.
Click Save to save the task and stay on the Edit Task screen so you can continue to make updates. Click Save and New to save the task and create a new task. Click Save and Return to save the task and return to the task list.
Procorem notifies the collaborators that are assignees or approvers on the task.
If you would like to delete a task, navigate to the main Task screen, and click on the task you would like to delete. At the bottom of the Task Details screen, click Delete.
Deleting tasks is permanent. Make sure this is what you want to do before you do it. You cannot delete a task that has been selected as a parent to any other task.
Each task as the ability to progress through the following statuses:
New—New tasks are tasks that have just been created.
Pending prior task completion—Tasks with this status are waiting on the completion of a prior task before they can be completed.
Pending Assignees—Once you add assignees to a task, it will move to the Pending Assignees status, until finished by the assignees.
Pending Approval—If you have added approvers to a task, then it will need to be approved to move from this stage.
Finished—Tasks are marked as Finished when all assignees finish their portion of the task.
Approved—Once the task is Finished it is ready for approval. Once all approvals are done, the task will be marked as Approved.
Completed—Completed tasks are finished by assignees as well as approved by any approvers.
If you do not add any assignees, approvers, or have pending tasks, the Task Status will progress from New to Completed without going through the other statuses.
Only the people that have been assigned the task will be able to finish their portion of the task. The exception to this rule is that people with Account Administrator access or top-level WorkCenter Role access can finish tasks on behalf of other collaborators on the WorkCenter.
In order for a task to be fully completed, it must go through three statuses: Finished, Approved, and Completed. Tasks that are both Finished and Approved are marked as Completed. A person with appropriate rights can move a task from New to Completed if no Assignees or Approvers have been added to the task. Completed tasks are shown as crossed off in the Task screen and Calendar views.
To finish a task, navigate to the WorkCenter Task screen. From here, you have two ways to finish the task.
The first option is to select the check mark next to the task on the main Task Screen. If the task has been assigned to you, you can finish the task right here.

Alternatively, you can click the task itself and select Mark Finished next to your name in the Task Details screen. The assignee or a collaborator with appropriate rights can finish the task in the Task Details screen.
Finishing a task is dependent on how the task is set up. If the task has multiple assignees with All Assignees must mark task as finished selected, then the task will not be Finished until that criteria is satisfied.
Approving tasks works much like finishing tasks. If you are an approver on a task, you can select the “Thumbs Up” icon next to the task.

Alternatively, you can click the task itself and select Approve in the Task Details screen next to your name.
Once a task is both Finished by the assignees and Approved by the approvers, the task will be marked as Completed. Completed tasks will show up in the Task screen and Calendar as crossed out to indicate their Completed status.