Introduction to the Properties Feature
The Properties feature allows you to manage the properties in your portfolio.
Access to the Property feature is controlled by module entitlements and user permissions.
The account administrator can create account roles with any combination of the following Property feature permissions.
Permission | What It Controls |
|---|---|
Create Property | Show the Add Property button on the Properties list and create new properties. |
Update Property | Show the Edit Property button on the property overview page and save changes to existing properties. |
View All Properties | Show the Properties menu item in the left navigation panel and access the Properties list page. Without this permission, the Properties section is hidden. |
Manage Buildings & Units | Add, edit, and remove buildings and units on any property, including the Add Building and Add Unit buttons. |
Export All Properties | Export all properties, buildings, and units in the account to a single XLSX workbook from the Properties list page. |
Export Blank Template | Download an empty Properties workbook (with headers and dropdowns, no data) for onboarding new properties. |
Import Properties | Upload an XLSX from the Properties list page to bulk-create or bulk-update properties, buildings, and units across the account. |
Export Single Property | Export a single property, including its buildings and units, to XLSX from the Edit Property page. |
Import Single Property | Upload an XLSX from the Edit Property page to bulk-update that property's buildings and units. |
For more information about account role security, see Manage Account Roles.
The Properties list page provides a clean, searchable, and sortable view of every property in your portfolio.
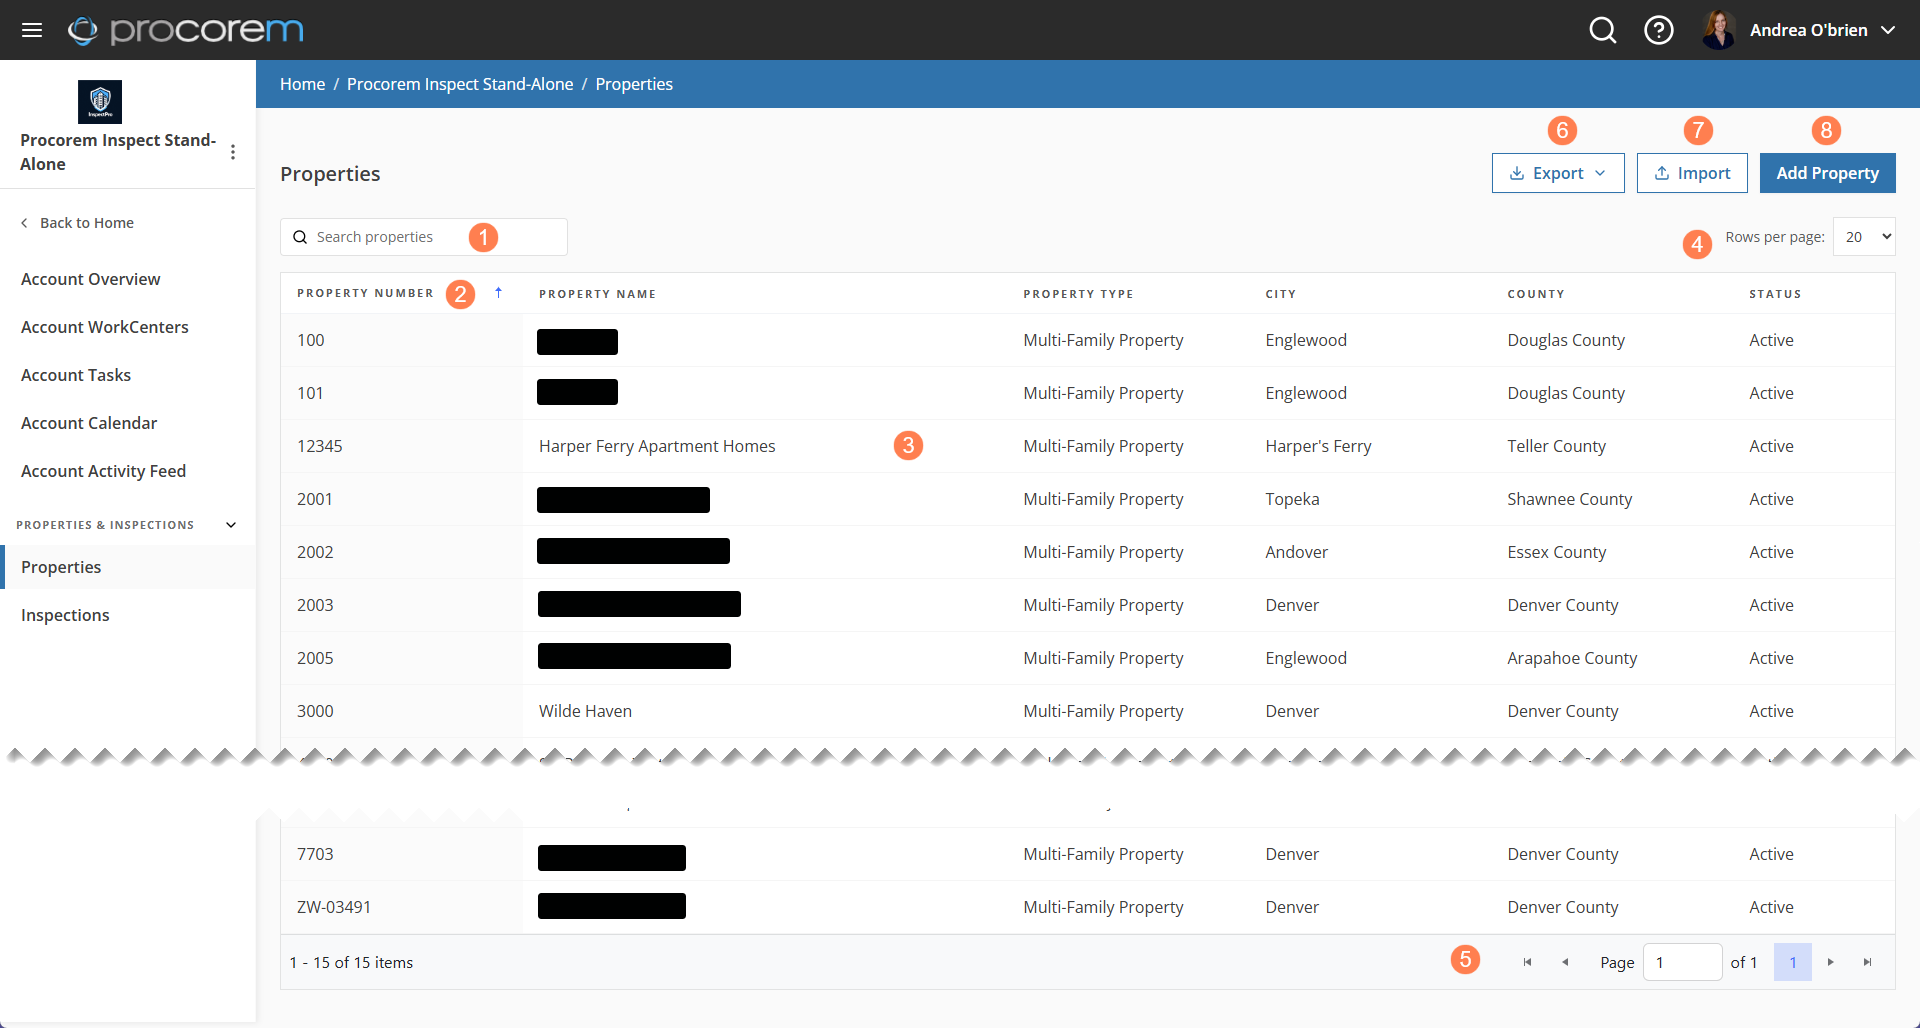
From the list page, you can:
Search by property name, number, city, county, or status.
Click a column header to sort the table by that column in ascending order. Click again to sort in descending order.
Navigate to the Property Overview for any record with a row click.
Define the number of records visible per page.
Navigate across pages.
Export an XLSX file of the entire portfolio (so you can review and share the list offline) or a blank template (so you can create a list of properties for import).
Import an XLSX file of properties, useful for onboarding new properties.
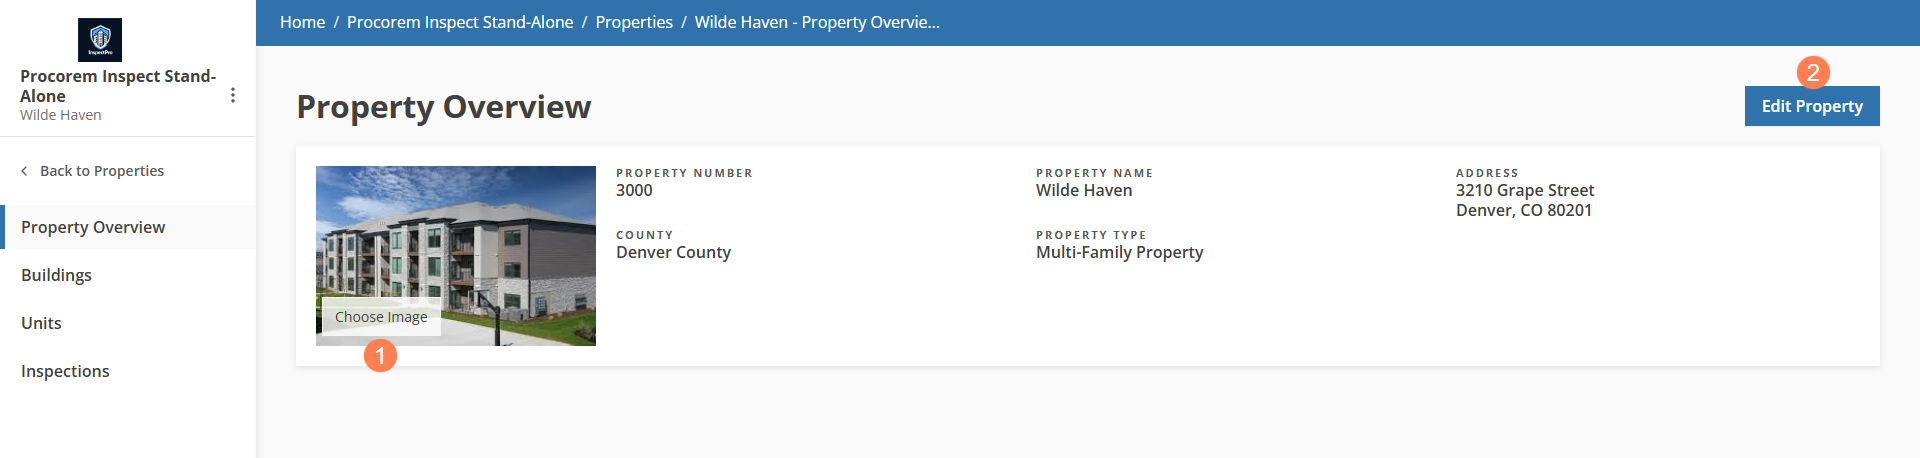
From the Property Overview you can:
Upload or change the property photo.
Navigate to the Edit Property page.
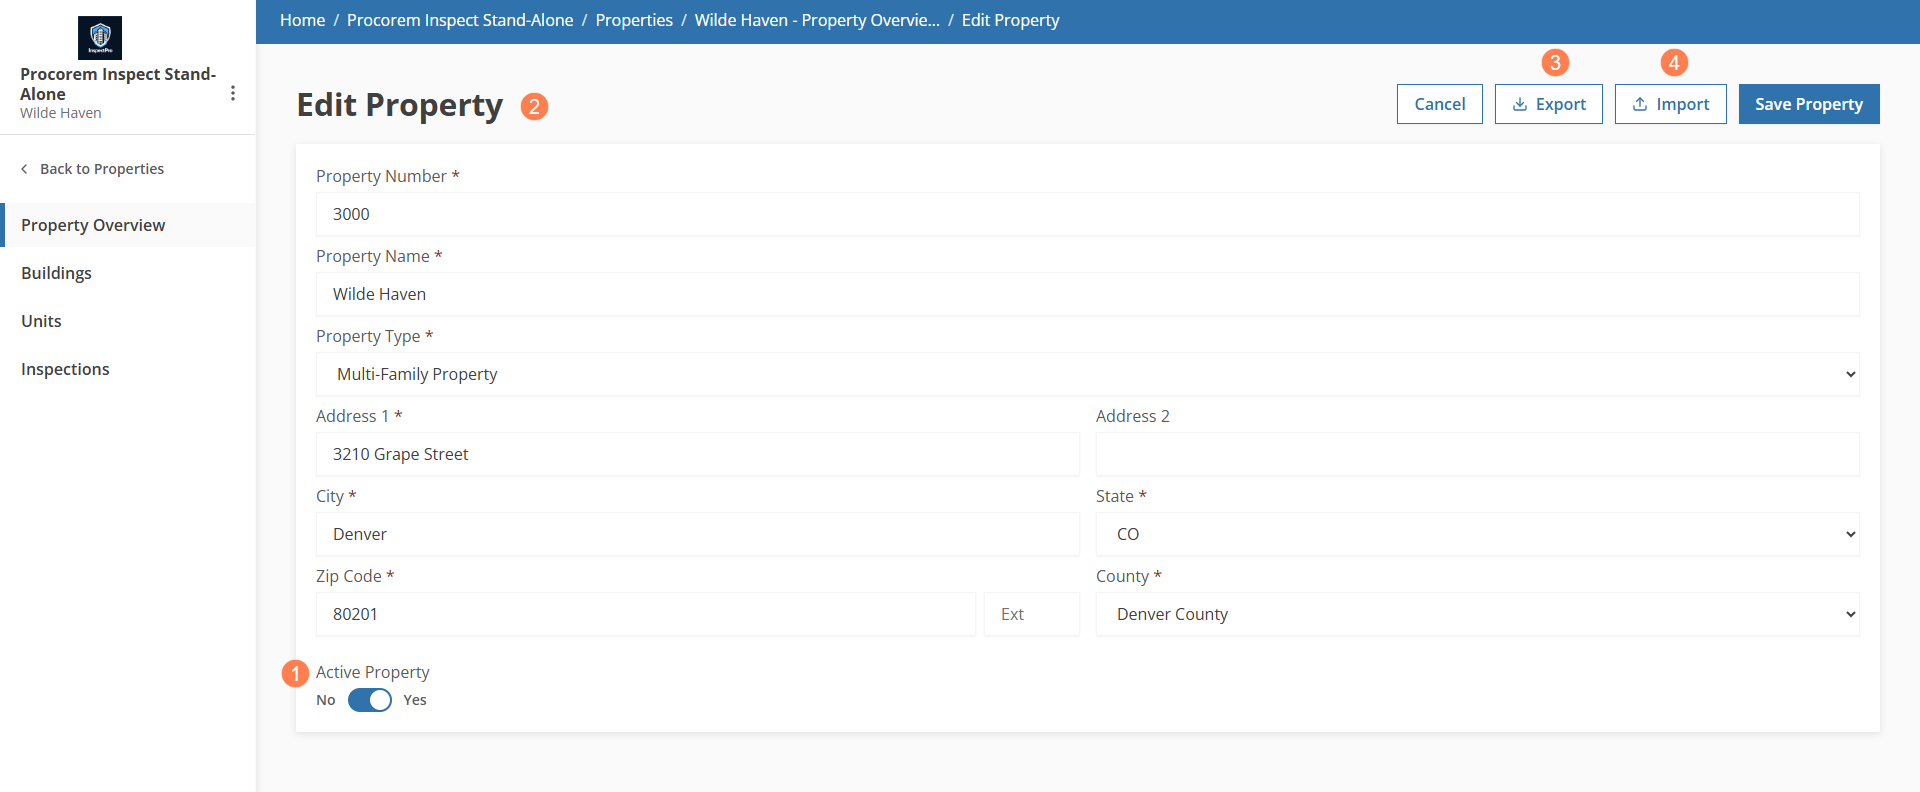
From the Edit Property page, you can:
Make the property active or inactive.
Update the property details.
Export an XLSX file for the property, with its buildings and units.
Import an XLSX file for property, useful for creating or updating the property's buildings and units.
Add a Property
The Add Property popup walks you through all required fields, validates your input as you go, and immediately navigates you to the new property's overview upon saving.
Caution
After you save a new property, you cannot delete it. You can set it to inactive.
From the Properties list page, click Add Property.
The Add Property popup opens.
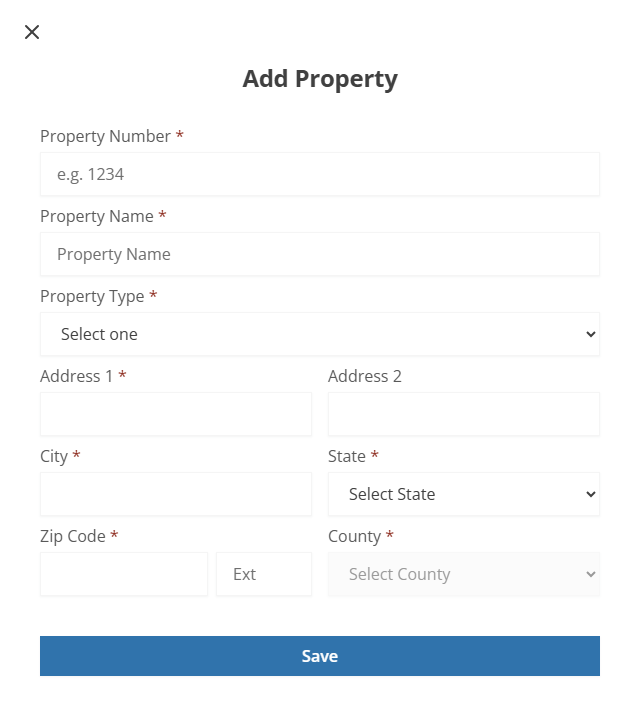
Enter the Property Number.
The system validates that the property number does not already exist in the portfolio (account).
Enter the Property Name.
Enter the Property Type.
Enter the Address, City, State, Zip Code, and County.
Click Save.
The Property Overview page opens.
Each property can have multiple buildings, and the new Buildings list page makes them easy to browse. Clicking a building takes you to its Building Overview page, where you'll see the building's address and type, along with a list of all units in that building.
Caution
If the building is associated with existing units or inspection areas, you cannot delete the building until those associations are resolved.
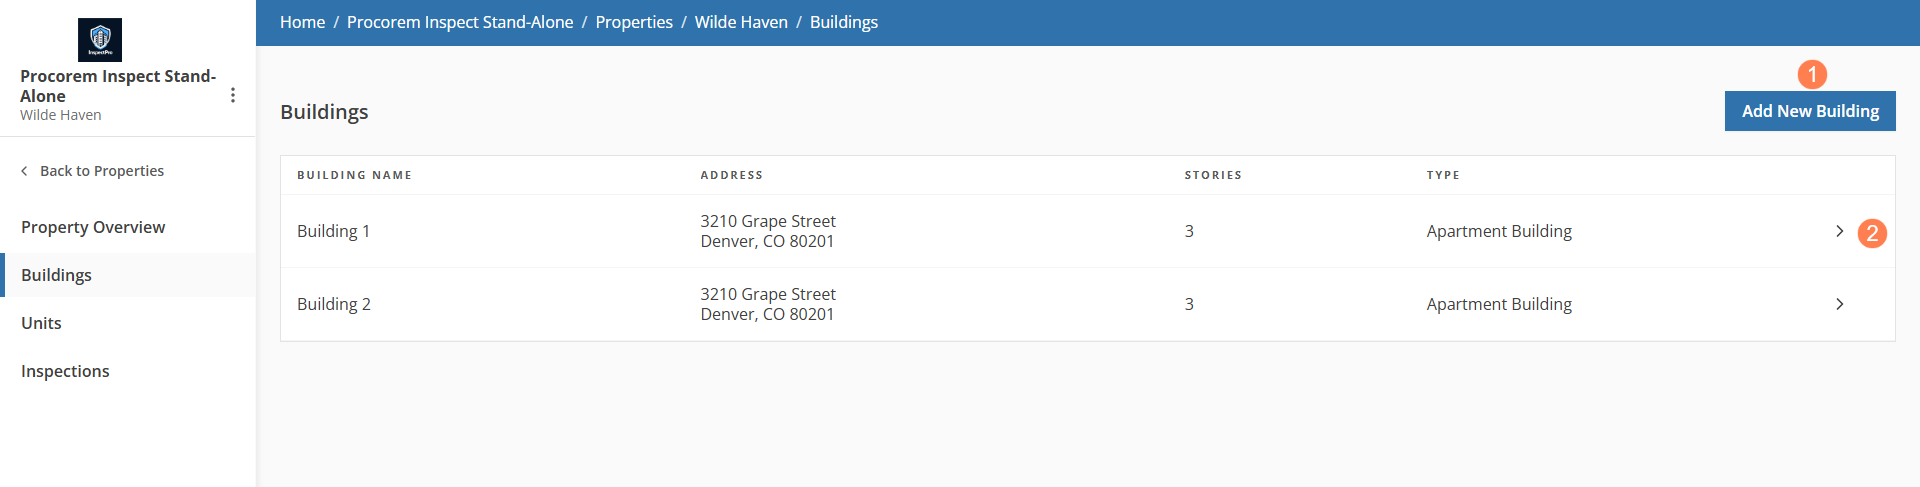
From the Buildings list page, you can:
View the building details.
From the Building details page, you can:
Edit the building information.
From the popup, you can delete the building if it is not associated with any units or inspection areas.

Add a unit.
Edit a unit.
Add a Building
You can quickly add a new building to the property.
From the Buildings list page, click Add New Building.
The Add Building popup opens.
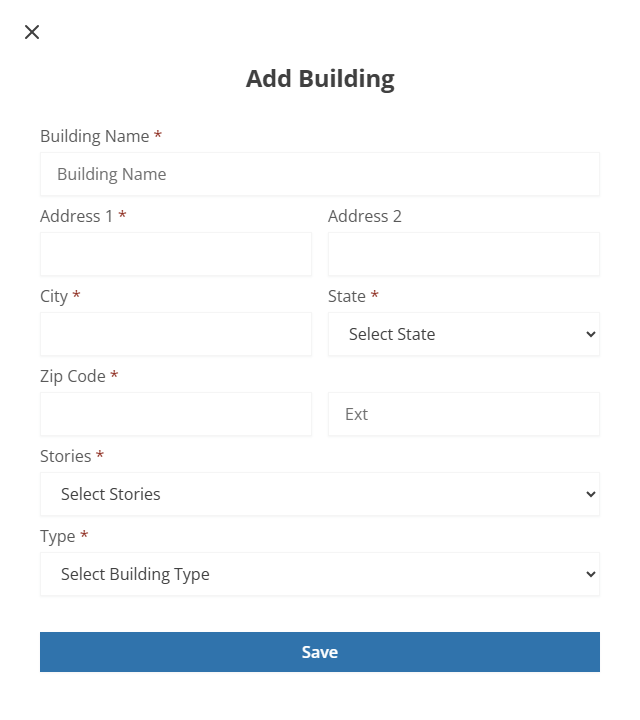
Enter the Building Name.
Enter the Address, City, State, and Zip Code.
Select the number of Stories for the building.
Select the building Type.
Click Save.
Units are managed at both the property level and the building level. The Units list page shows all units across a property, sorted by building and unit number, while the Building Overview page shows only the units for that specific building.
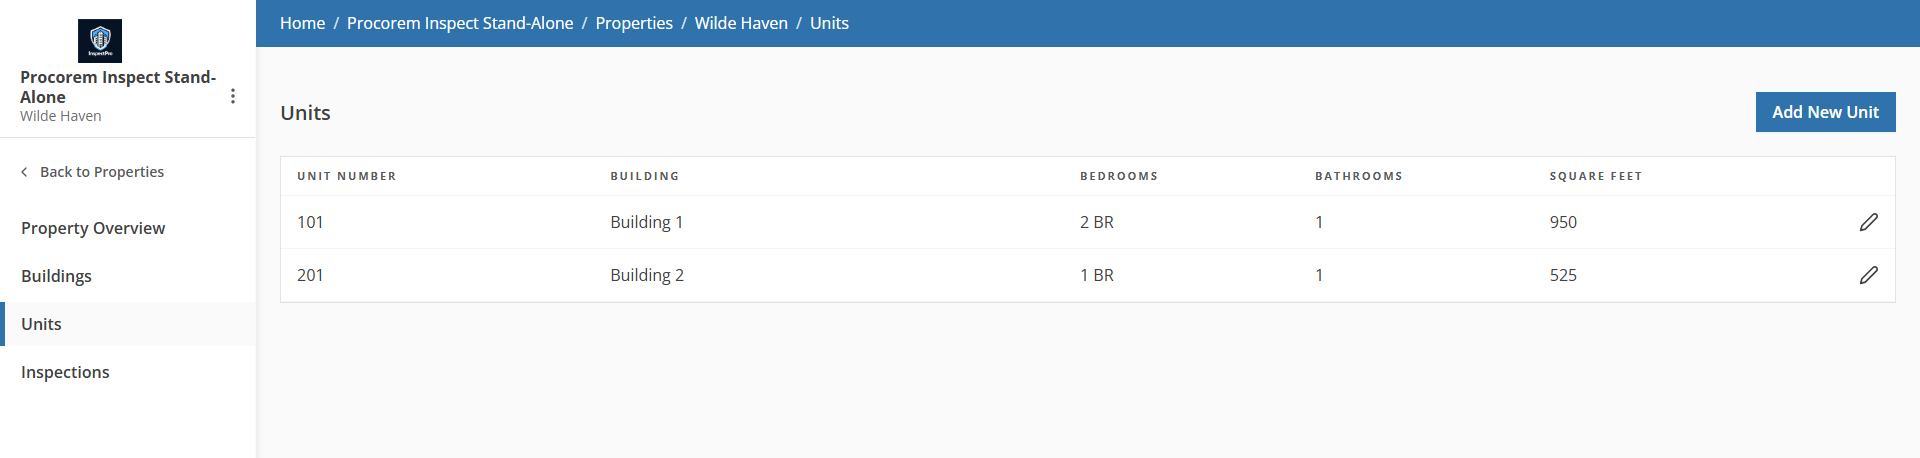

Units at property level; units at building level
From either view, you can:
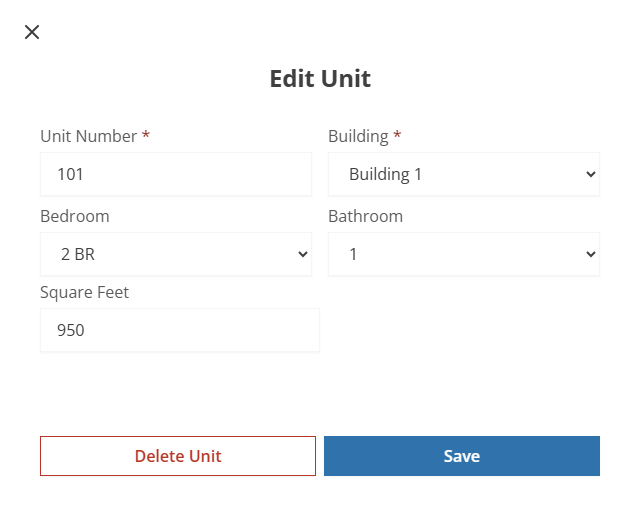
Edit the unit.
From the popup, you can delete the unit if it is not associated with any records.
Caution
If the unit is associated to any other record (such as, an inspection area), then you cannot delete it.
Add a Unit
Adding a new unit is quick and easy.
Click Add New Unit (on the Units list page or the Building details page).
The Add Unit popup opens.
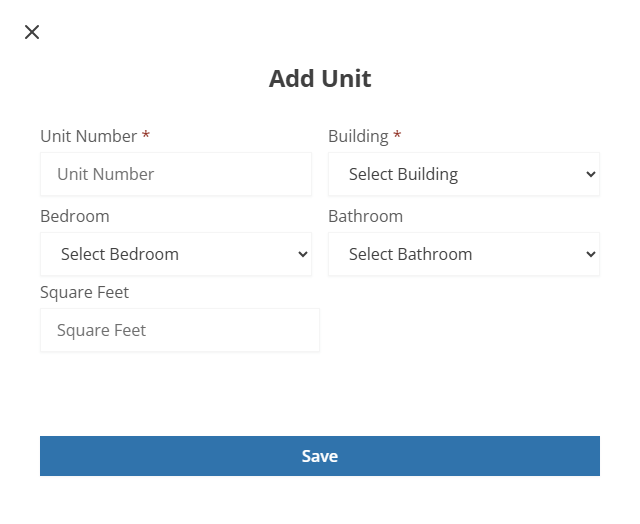
Enter the Unit Number.
Select the Building.
Optionally, select the Bedroom.
Optionally, select the Bathroom.
Optionally, enter the Square Feet.
Click Save.